site logo
  • Home

    • Projects

    • Portfolio

    • Tools

    • See All

  • My Tools

  • Merch

  • Contact

YRTi

I Just Tried?

  1. Home
  2. Woodworking
  3. Projects
  4. A DIY Router Plane with Interchangeable Base – Part 2
Projects

A DIY Router Plane with Interchangeable Base – Part 2

DIY smaller router plane

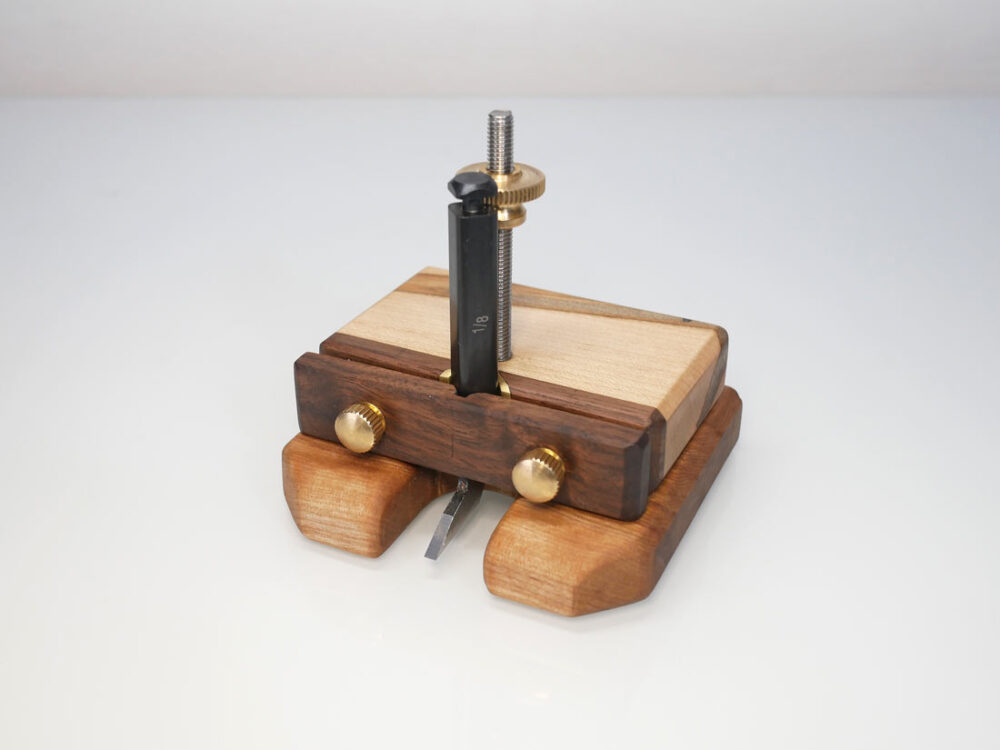
I finally made a new version of my DIY router planes with Veritas cutting irons.

In this part 2, I will show the plan for the smaller router plane. You can check the bigger one from the part 1 from here and if you want to know the hardware I used and the detailed tips of how I fabricated, please check out part 3 from here.

You can also watch my video of making this plane.

  • DIY Router Project
  • A DIY Router Plane with Interchangeable Base – Part 1
  • A DIY Router Plane with Interchangeable Base – Part 3

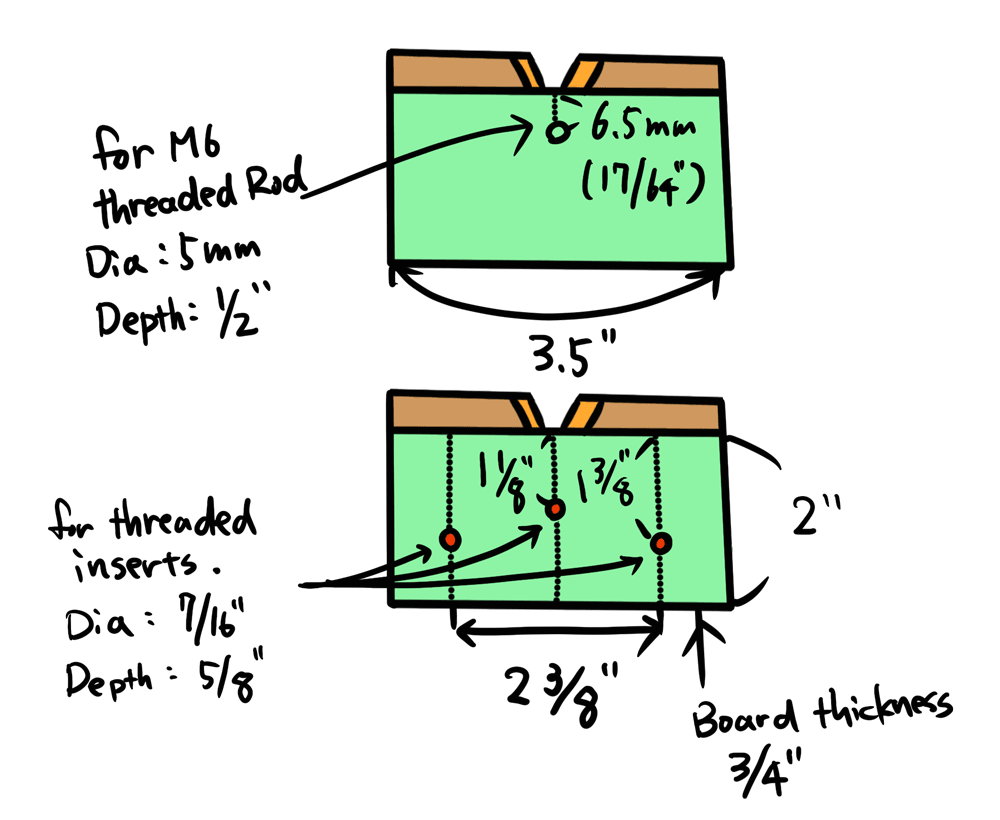
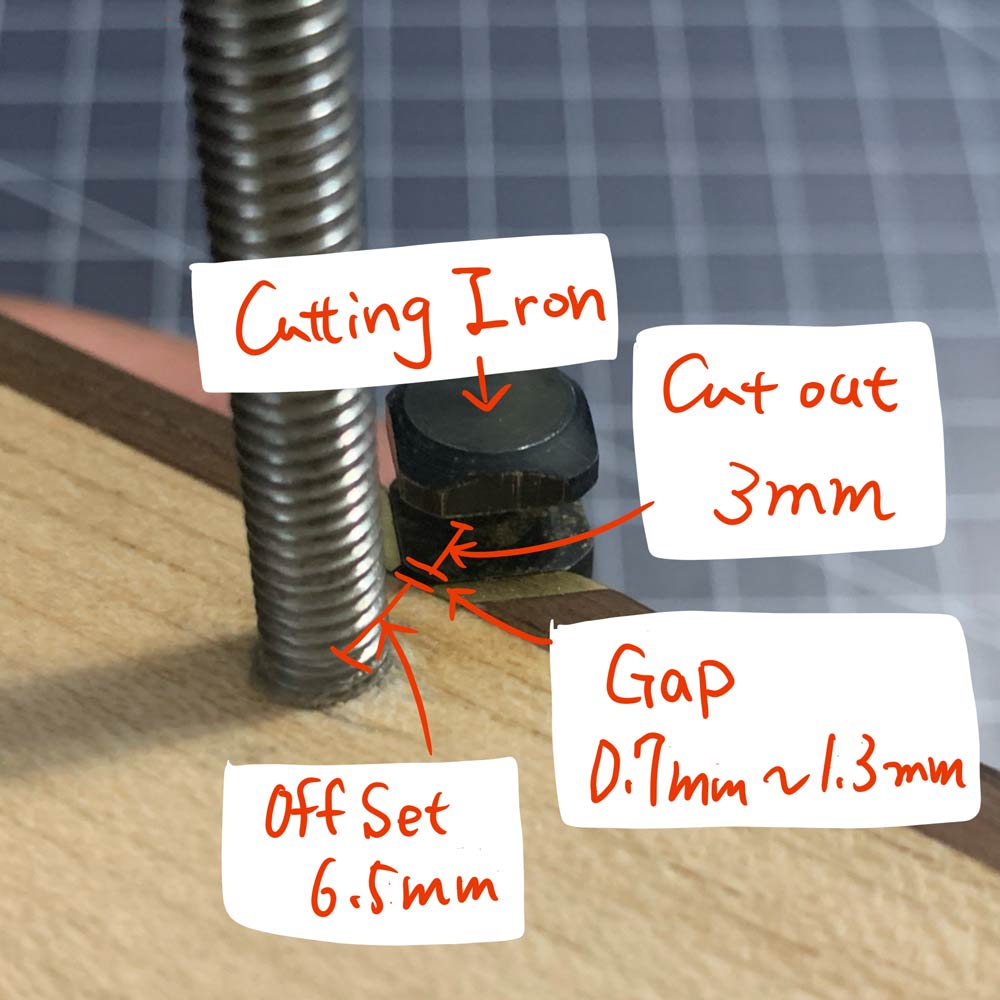
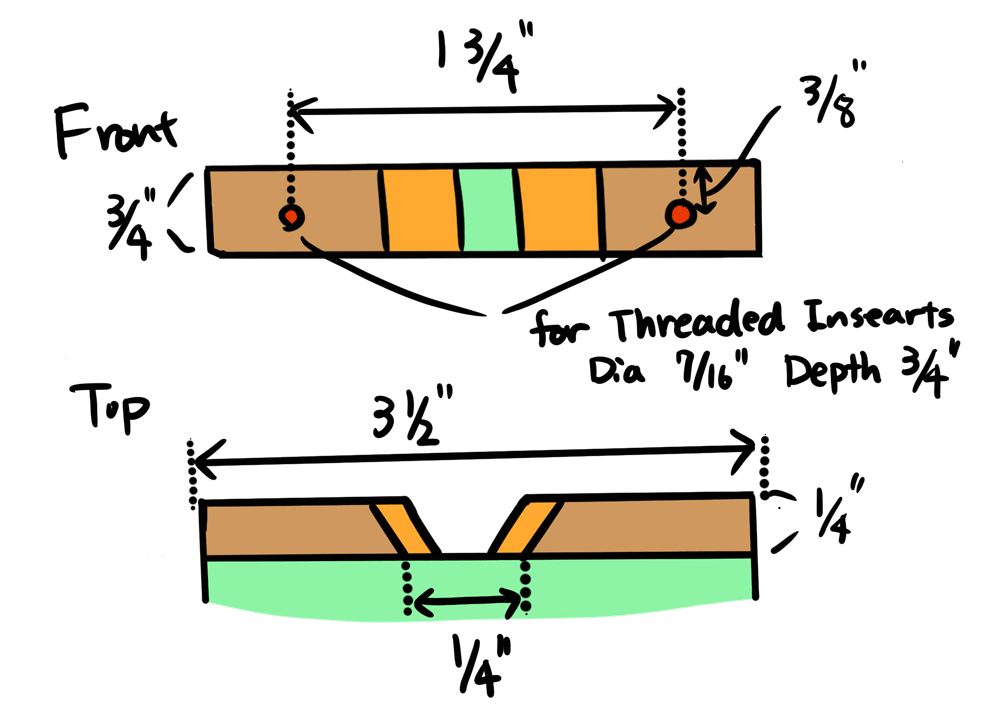
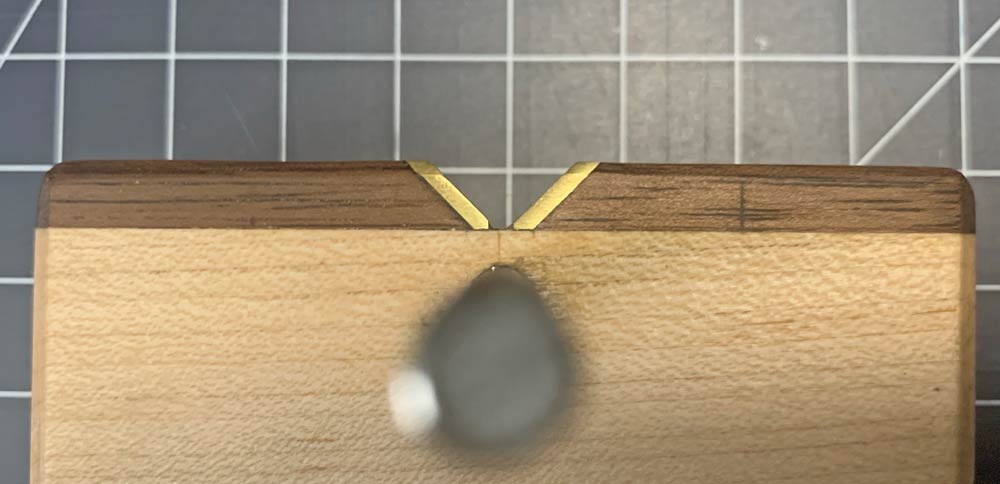
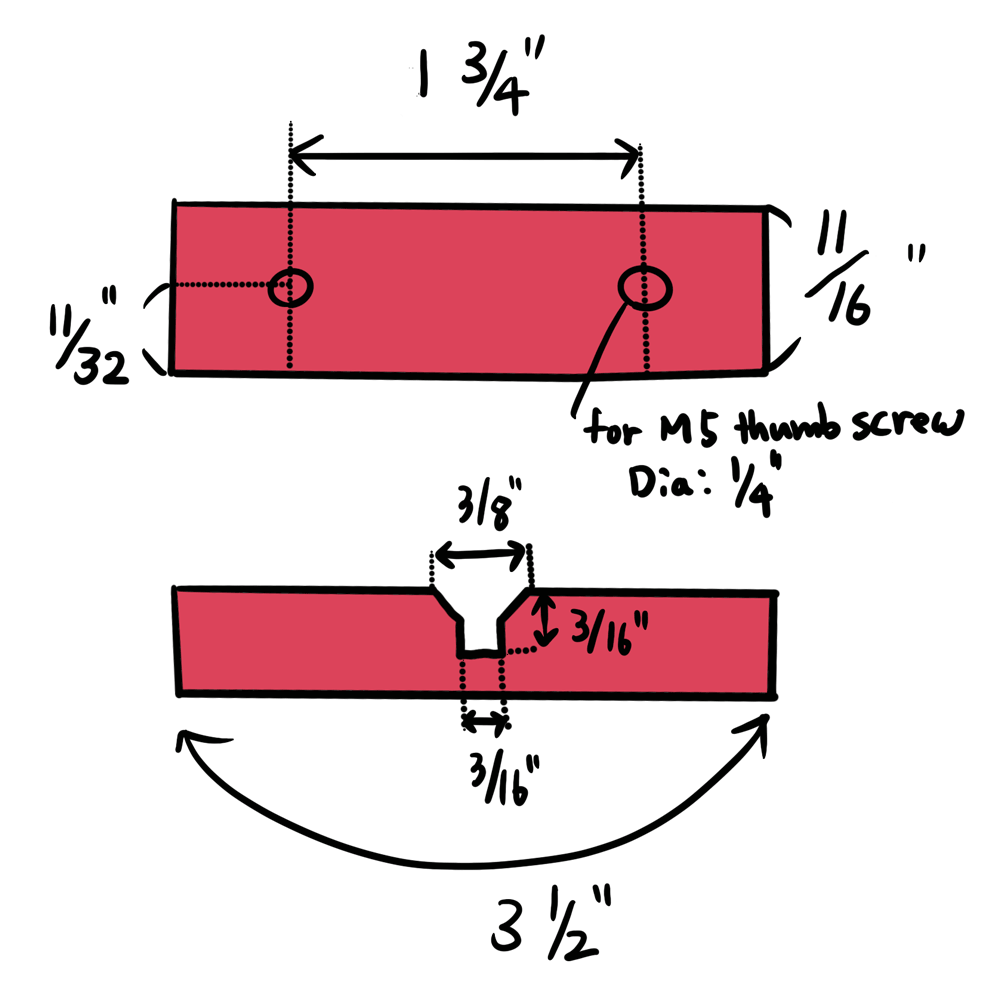
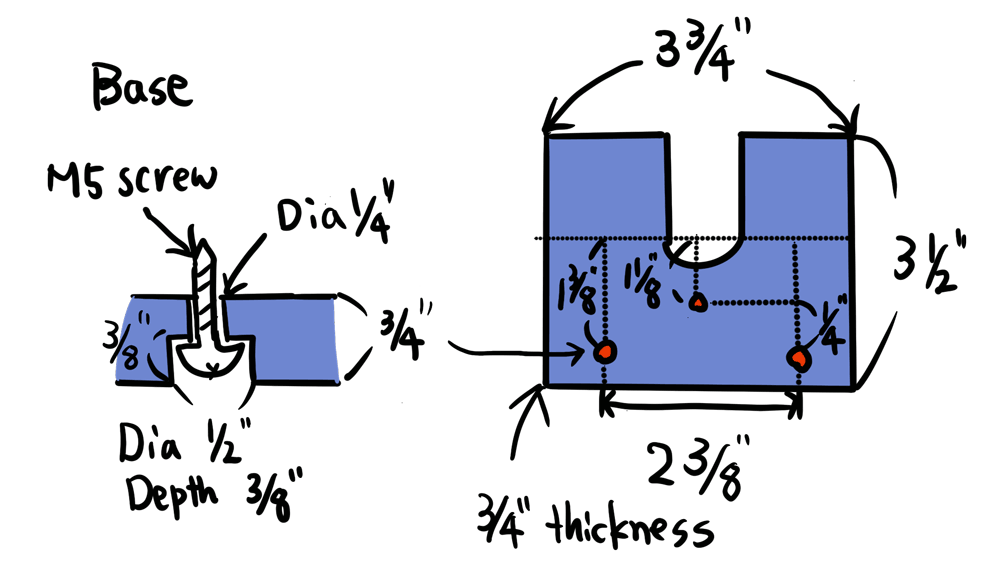
NOTE: In the drawing, I didn’t specify the distance of each feature from the center but these router planes are symmetric so you can divide the distance(side ways in the picture) by 2 and align them from the center of your work piece. In addition, the hole size is specific to the hardware I purchased.

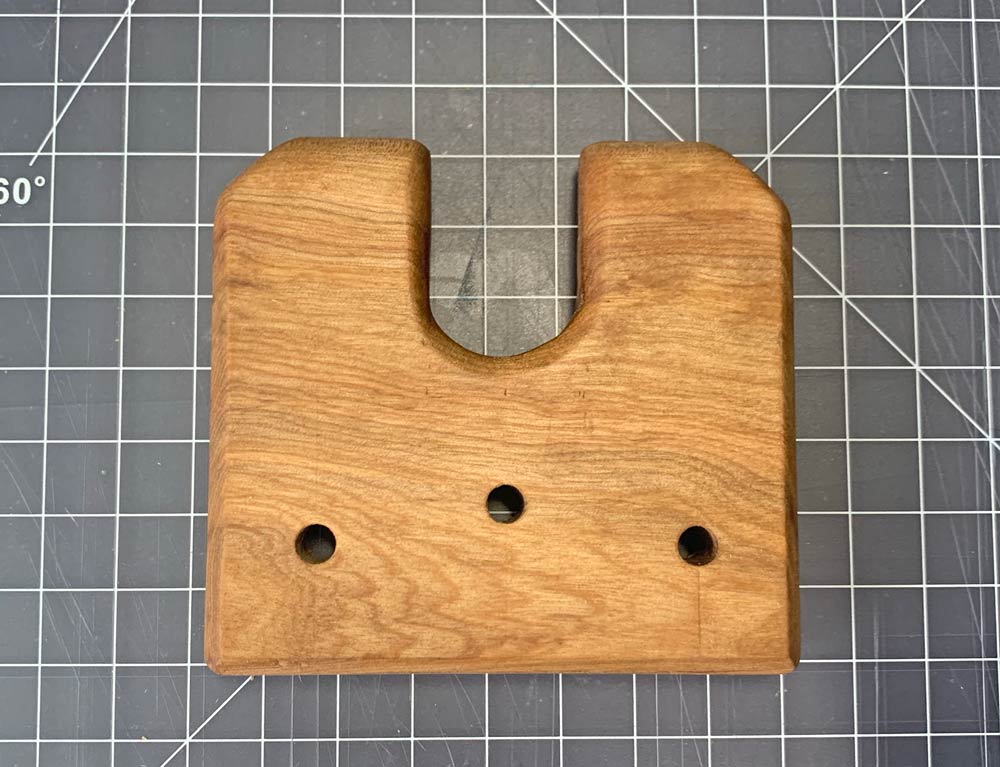
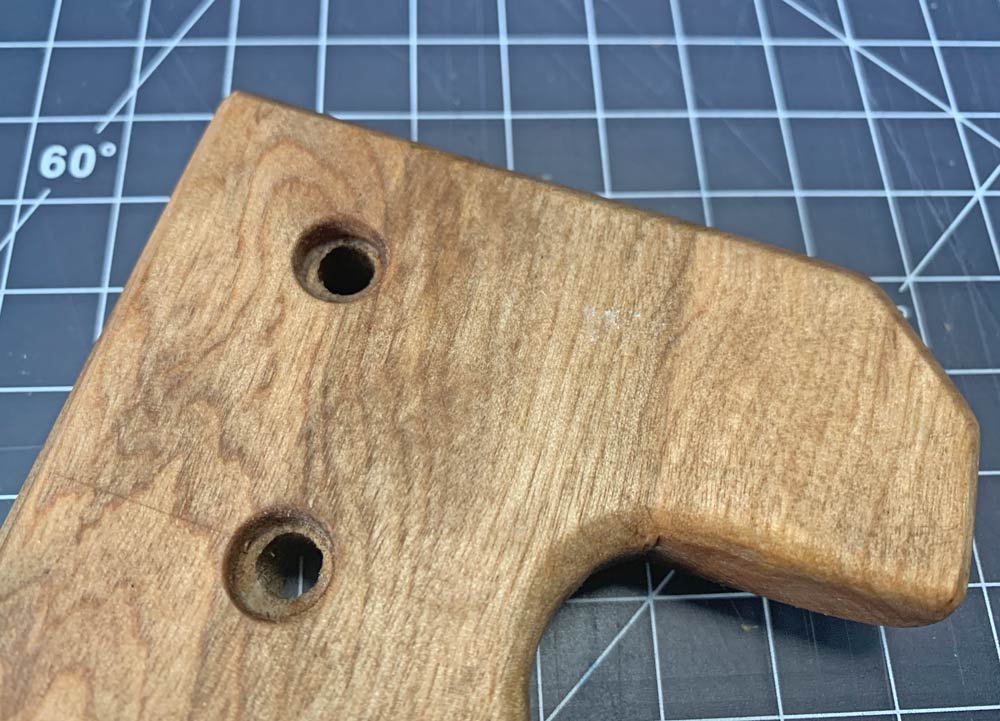
Plan For the Smaller Router Plane
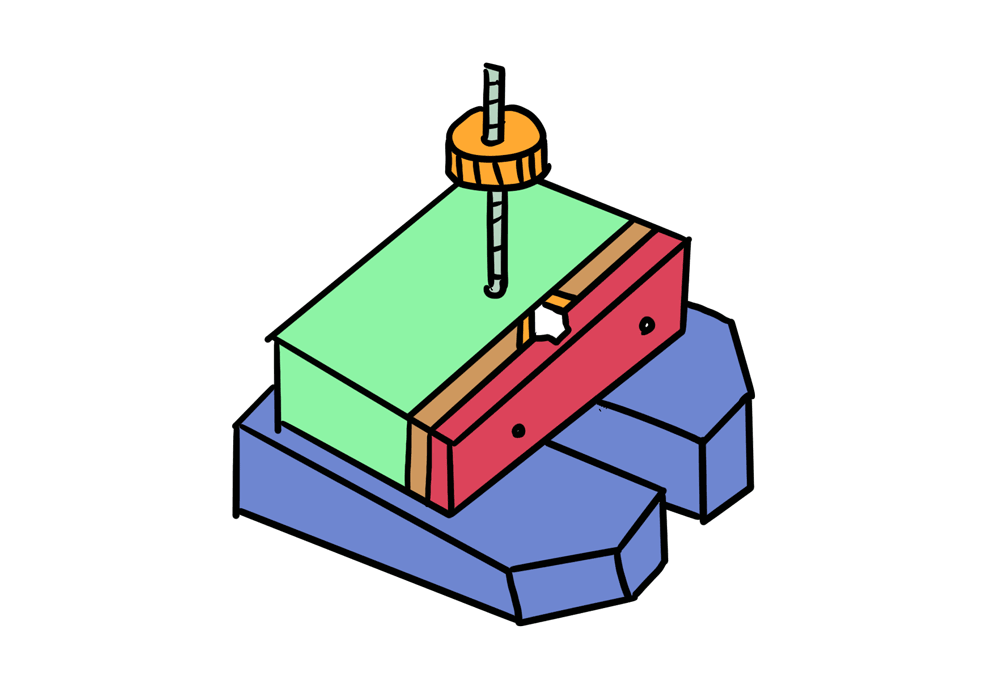
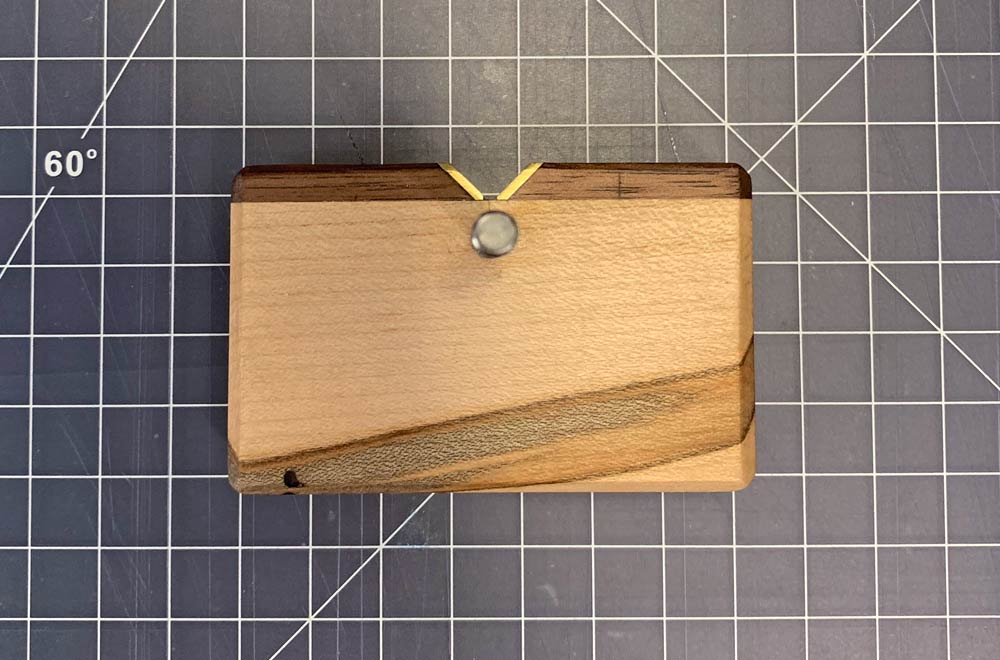
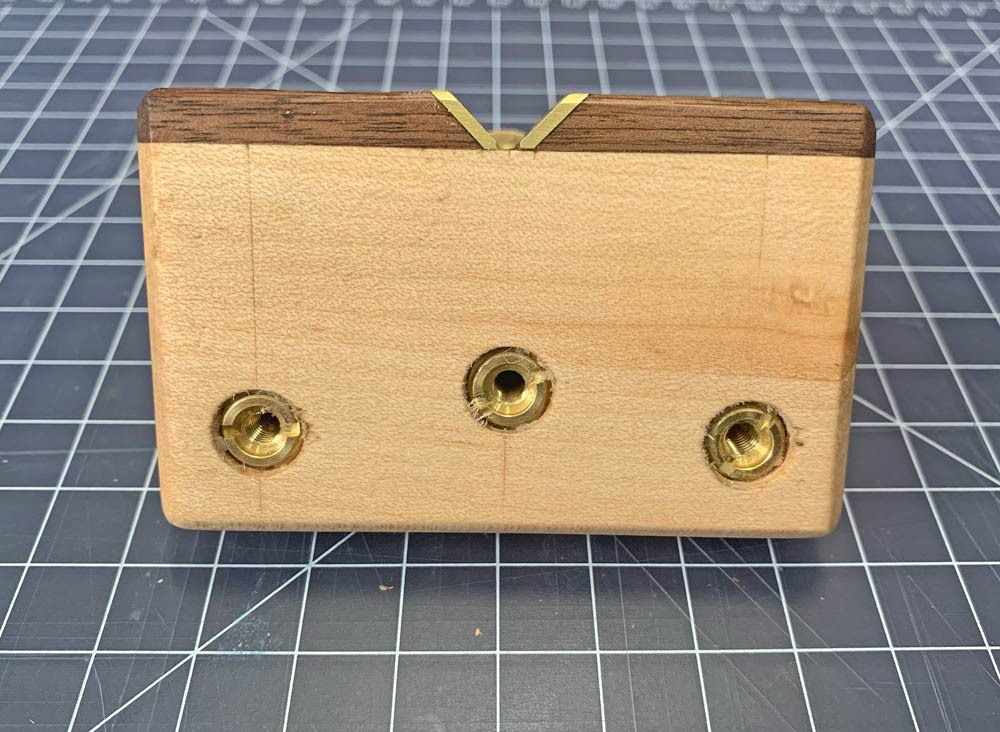
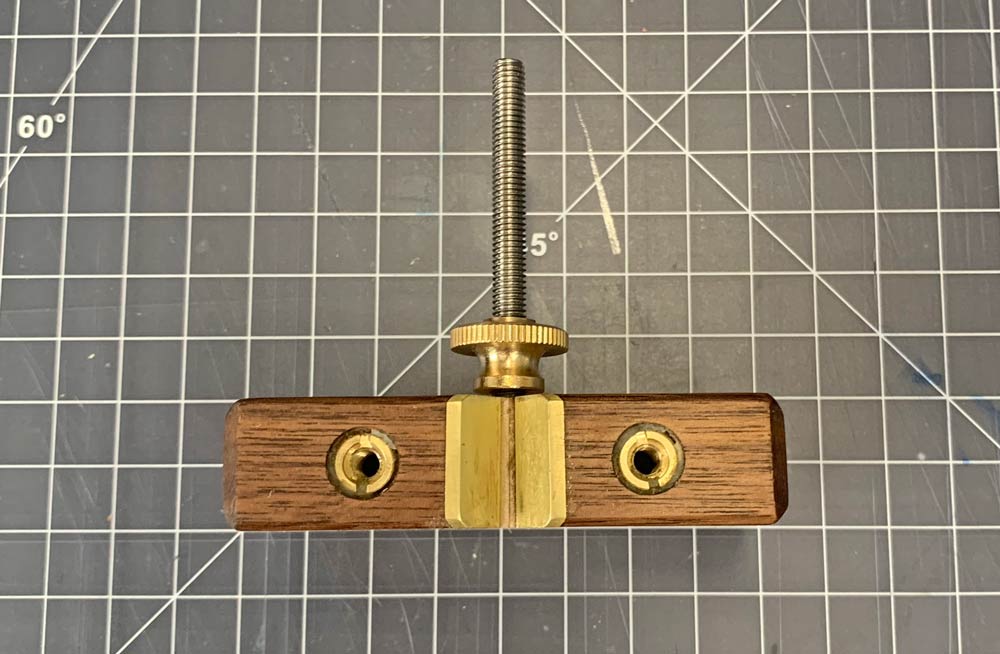
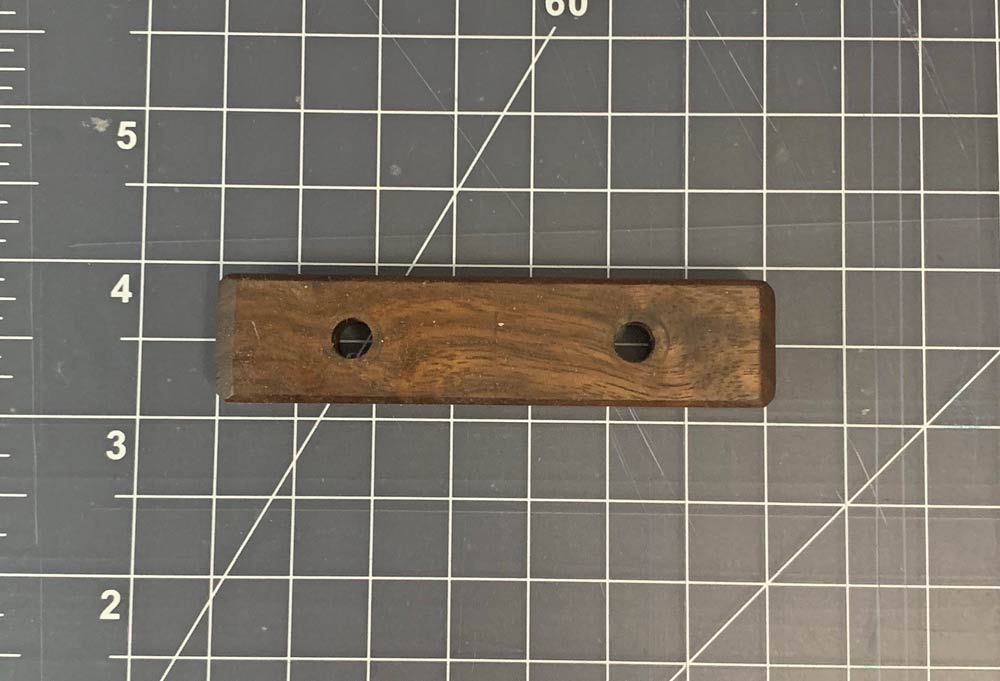
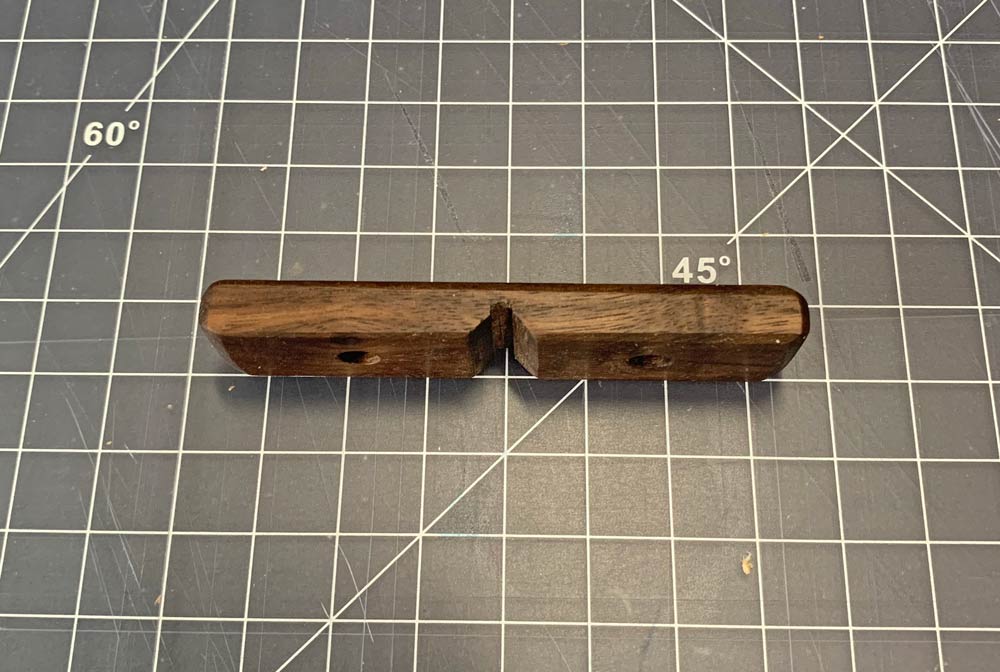
Mini router

Main Body

smaller one body
The hole position for the M6 threaded rod is 6.5mm away from the edge but depending on how accurate your fabrication is, maybe it’s 6-7mm away from the edge. Please test fit the cutting iron before making the hole.
Smaller one top
smaller router bottom
offset for m6 threaded rod
The diameter of the thumb nut that goes into the threaded rod is 20mm and I wanted a 0.5mm room to rotate the nut inside the cutout of the cutting iron so my offset is 6.5mm(the gap was a little bit smaller than 1mm). Please measure the gap to decide the actual offset distance.
smaller one clamping
The distance between the walnut pieces is 1/4″, not the distance between the brass pieces.
smaller router clamping face
Since this router plane is compact and easy, please take time on the accuracy of the clamping function. This will make a difference of the router plane quality.
smaller router clamping
As I attached the walnut pieces before the brass pieces, I only measured the distance between the walnut pieces(1/4″). With a 0.065″ thick brass sheet, it was perfect.
smaller one clamping
As the holes are bigger than the actual screw size, if the height is 3/4″ instead of 11/16″(the same thickness as the main body ), a screw may bite the side wall of the hole and this piece may be trapped with the router base and the screw when you tighten the screws so it has to be 11/16″ or smaller.
smaller router clamping face
smaller router clamping top
smaller one base
smaller router base top
smaller router base bottom
smaller router base coutersink
Since the main body for this router plane and this base are 3/4″ thick and I used 25mm(1″) screw, the countersink depth has to be very precise or I can’t tighten the base or the screw head may come below the base. If you have shorter screws like 20mm(3/4″), I think it’s safer.

Just Try!

It’s only one day to build with hand tools. If you want a bigger one, please check out part1 and if you want to know more details about the hardware and fabrication tips, please go to part 3.

Related Tags

  • Beginner Project
  • Hand Tools
  • Router Plane
  • Shop Tools
  • Tool DIY
PrevA DIY Router Plane with Interchangeable Base – Part 1
NextA DIY Router Plane with Interchangeable Base – Part 3

Primary Sidebar

YRTi

YRTi

I try something and I then share the experience for someone who also wants to try it as an Entertainment on YouTube. For the time being I stick to woodworking.

Please follow IG & check my video on YouTube Please

About Me

I take your custom order.

  • Home
  • About
  • Contact
  • Privacy Policy
  • T&C

© 2025 YRTi.net - All Rights Reserved.

I Just Tried It