This guide summarizes how I set up a very reasonable 42mm Kakuri Japanese hand plane, often chosen as a first Japanese plane by many woodworkers. This plane is simpler than a pricier traditional Japanese plane, making it fun to experiment with.
–> Added section : Trim a Mimi of Cutting Iron
Please note this isn’t a traditional way of setting Kanna and I just did it for specifically Kakuri 42mm plane.
Tools You Need
I selected reasonable options
- Diamond plate / POWERTEC Diamond Sharpening Stone, 150/600
- Sharpening Stone / KING KW65 1000/6000 Grit
- Hammer / Grace USA 8 Ounce Brass Hammer
- Surface plate / Taytools 773420
Set Up Process
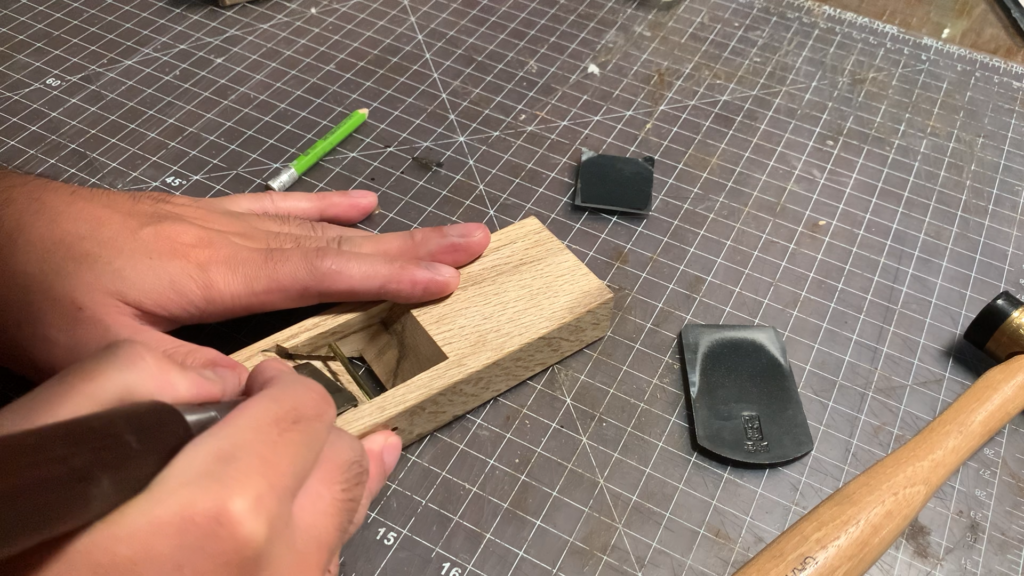
Removing the irons
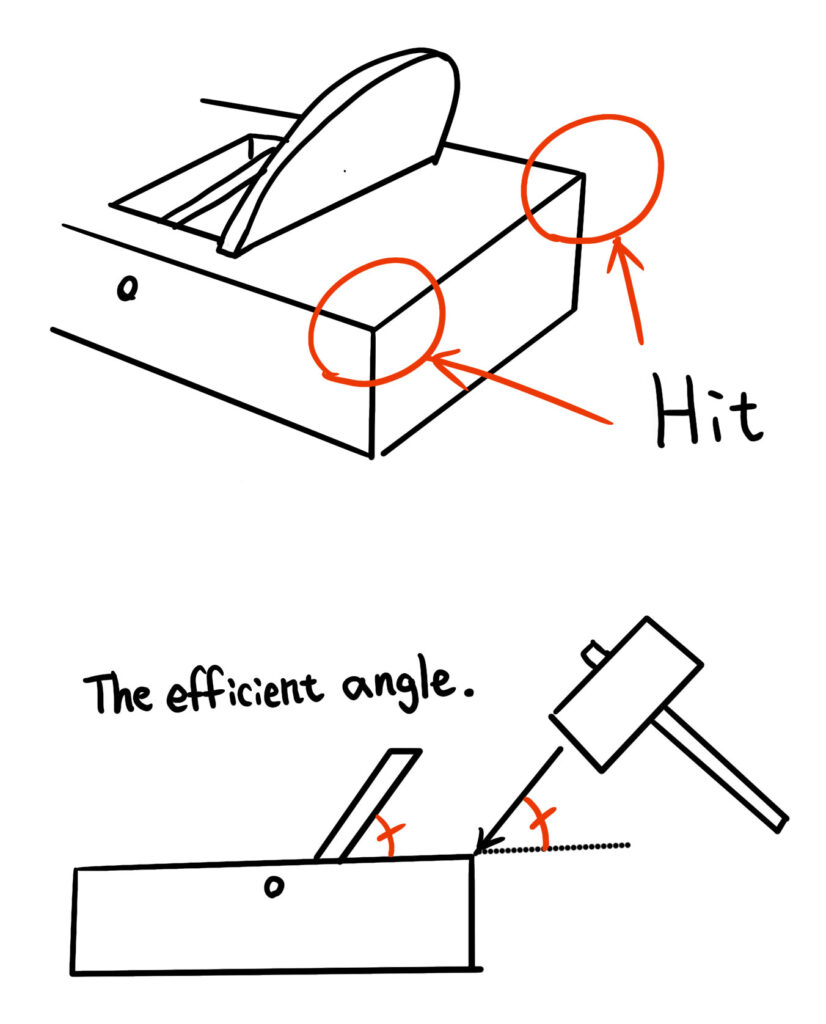
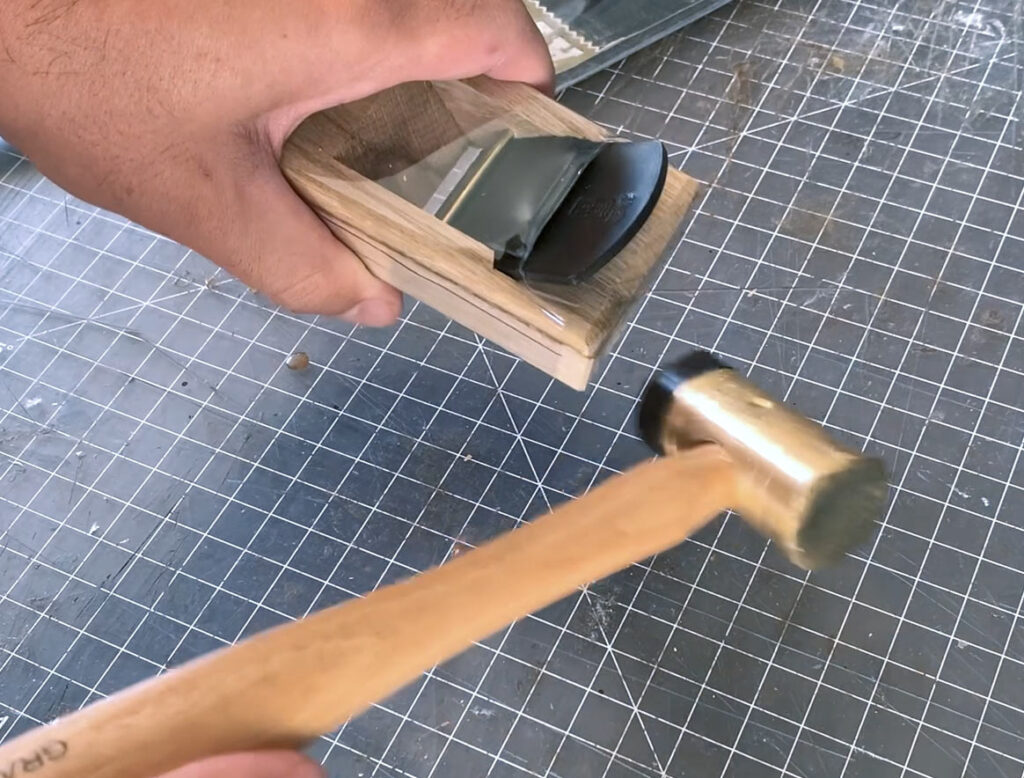
When you first get the plane, remove the cutting iron and chip breaker using a hammer. Make sure to hit only the correct areas of the base to avoid splitting it. If you strike the wrong place, the dai can crack.
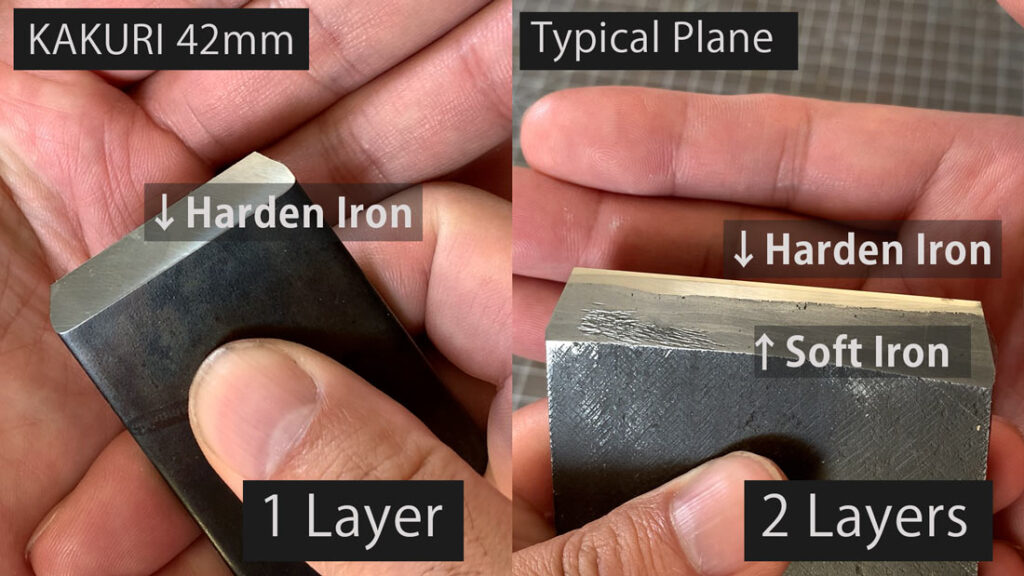
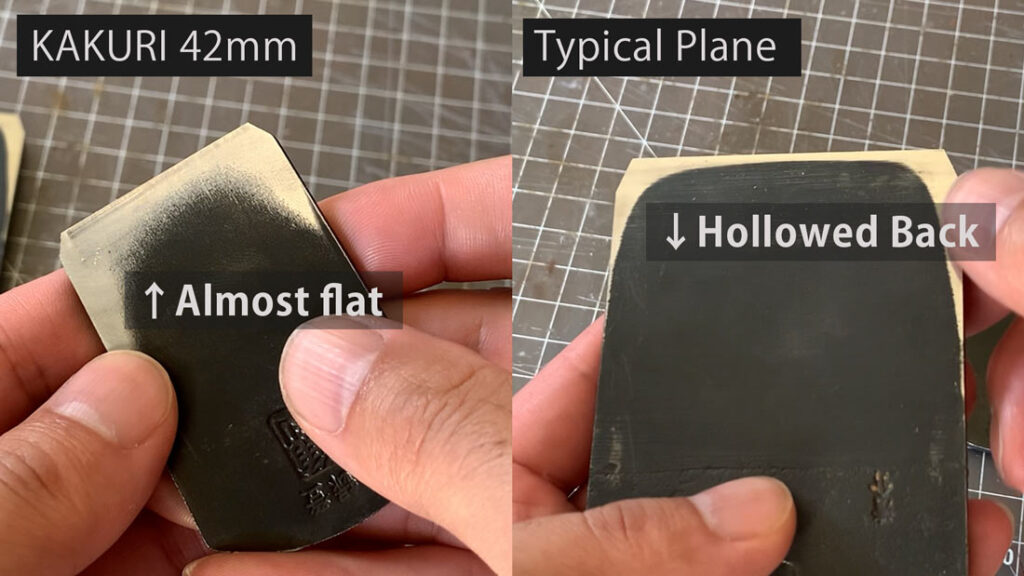
Understanding the iron vs. Typical Japanese plane irons
Unlike a standard Japanese plane iron that has two layers and a hollowed back called urasuki, this small iron is a single hardened layer and has no hollow. Even without urasuki, it performs well enough for most small woodworking tasks.
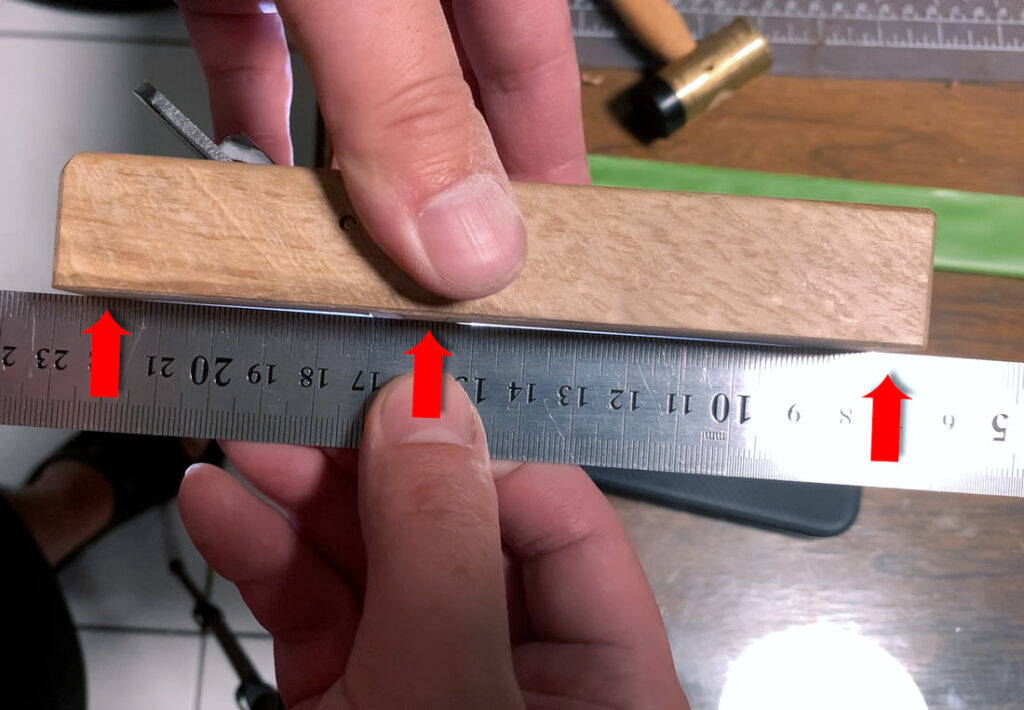
Flattening the back of the cutting iron
Using a diamond plate, flatten the non bevel side of the cutting iron, which is called the ura. This process is called Uraoshi. If part of the edge is too far from contacting the plate, with a traditional laminated iron you would perform uradashi by tapping from the bevel side with a hammer to push the edge forward. However, since this is a single-layer iron, you cannot perform uradashi, so you simply grind it flat until the entire edge makes contact.
Here is an easy solution for flattening the back. When flattening, do not move the iron only straight back and forth, as that can create a bump. Instead, move it back and forth while gradually shifting it sideways. This helps prevent high spots and ensures the cutting edge becomes flat.
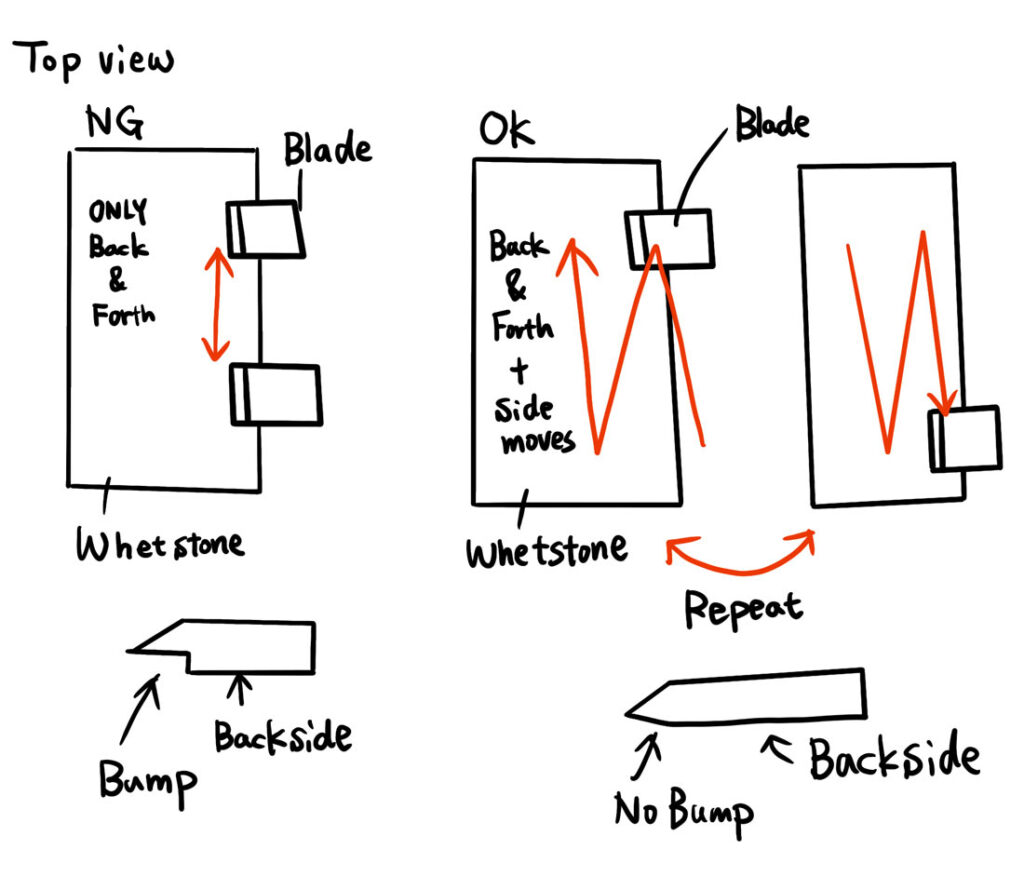
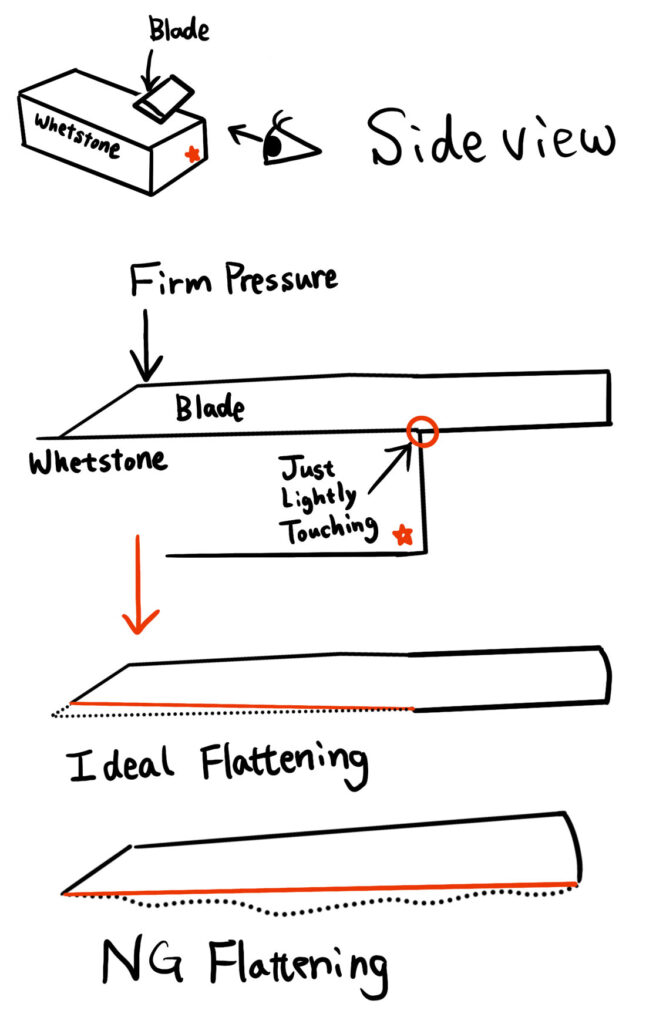
If you prefer a more traditional method, firmly press the edge side of the blade and move it back and forth. This requires a bit of skill, or the blade may end up developing a bump.
Flattening and fitting the chip breaker
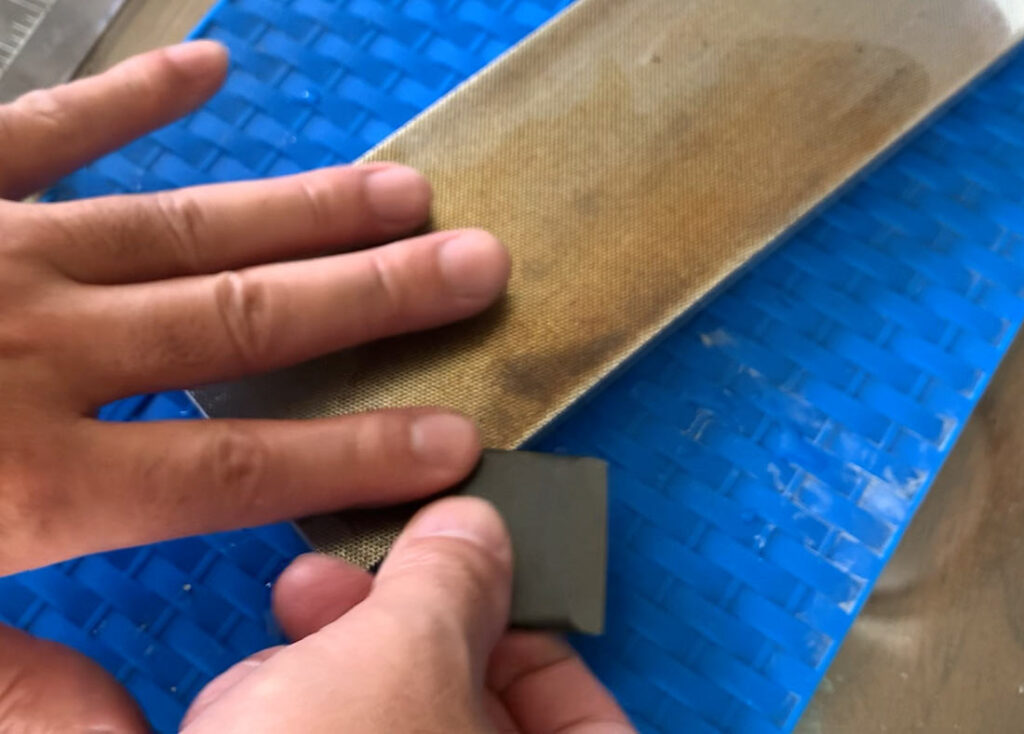
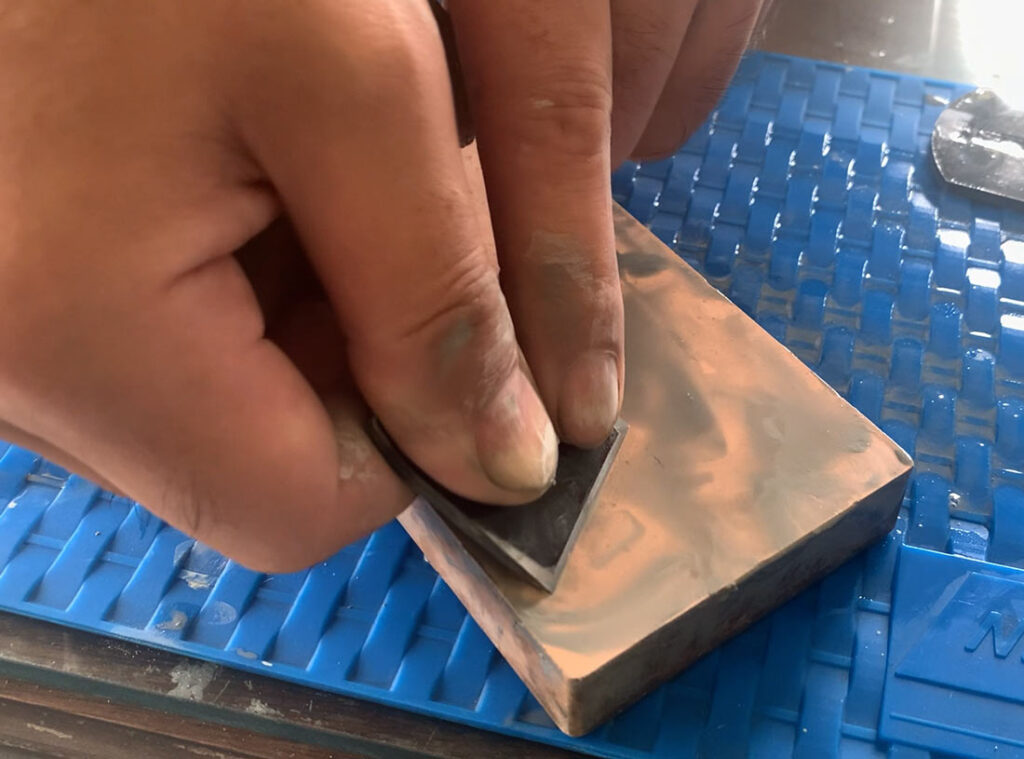
Flatten the chip breaker in the same way. Then check whether it contacts the cutting iron without any gap. If you see light between them or feel wobble, adjustment is needed. Traditionally, you would tap high spots with a hammer to make it flat, but for this chip breaker, you can simply grind the corners slightly with a diamond plate so it sits tightly against the cutting iron.
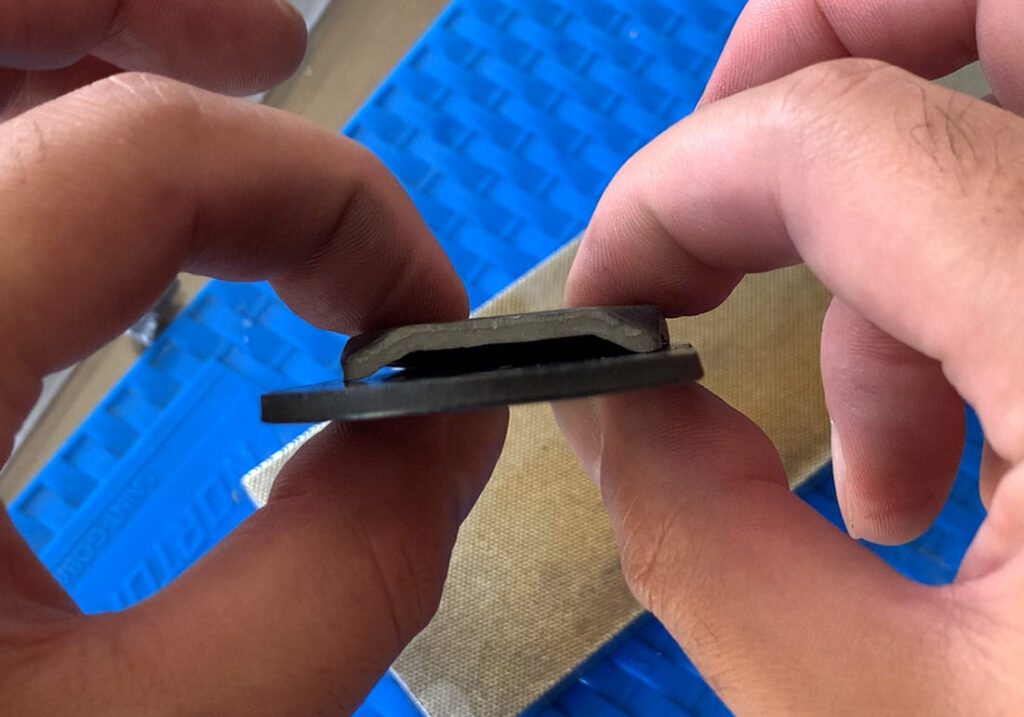
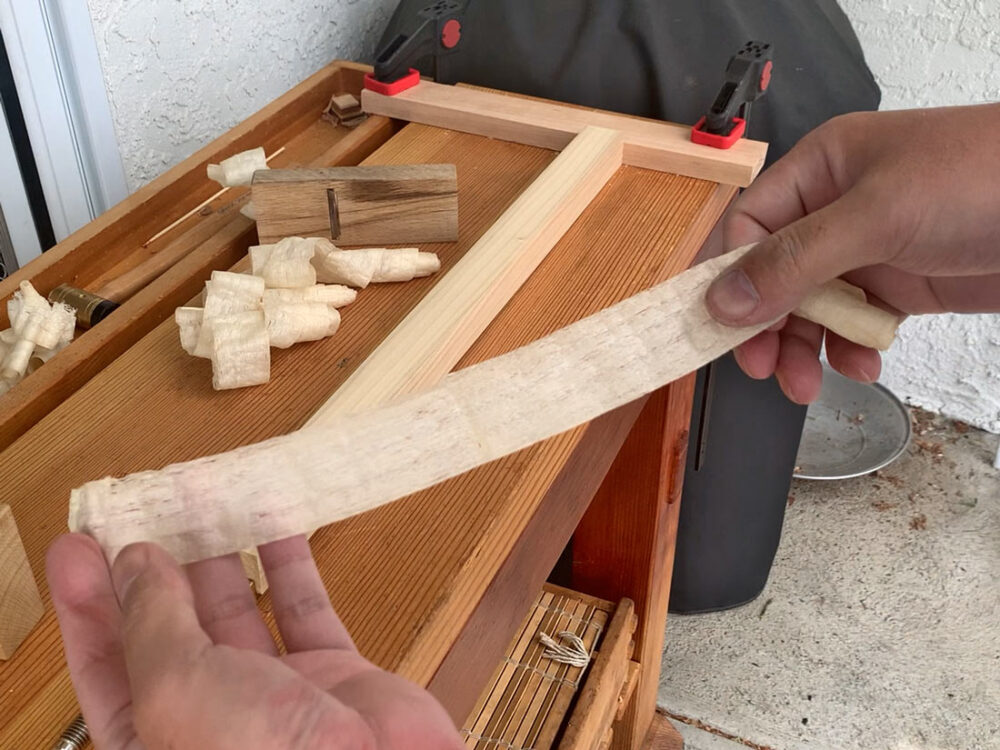
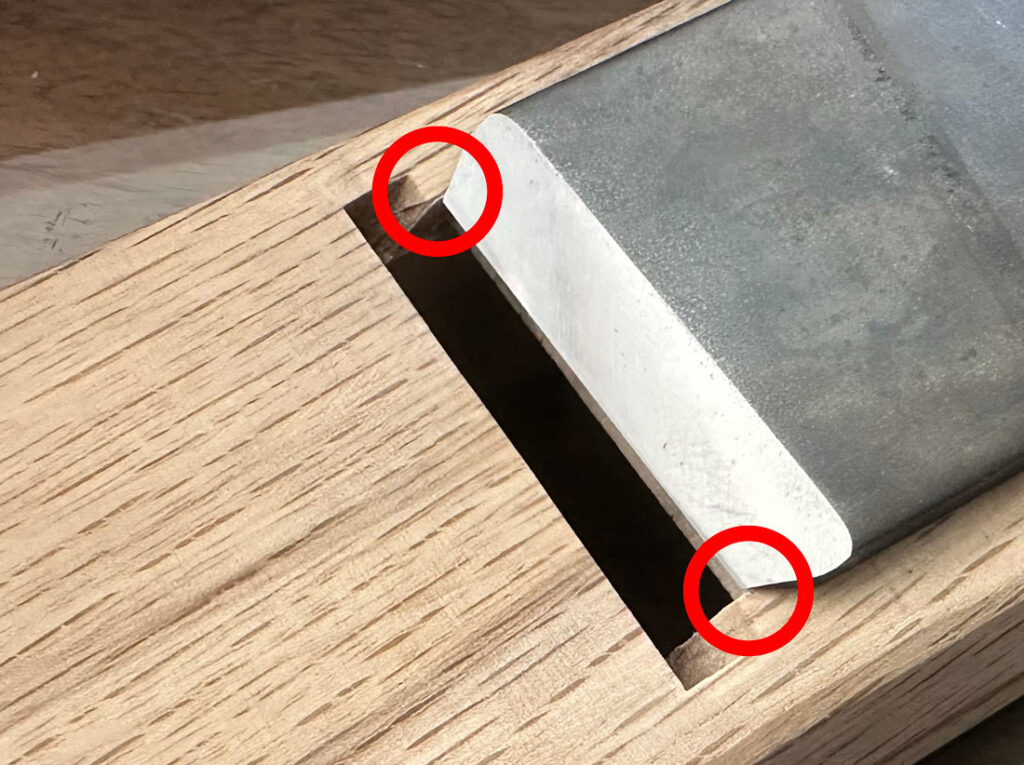
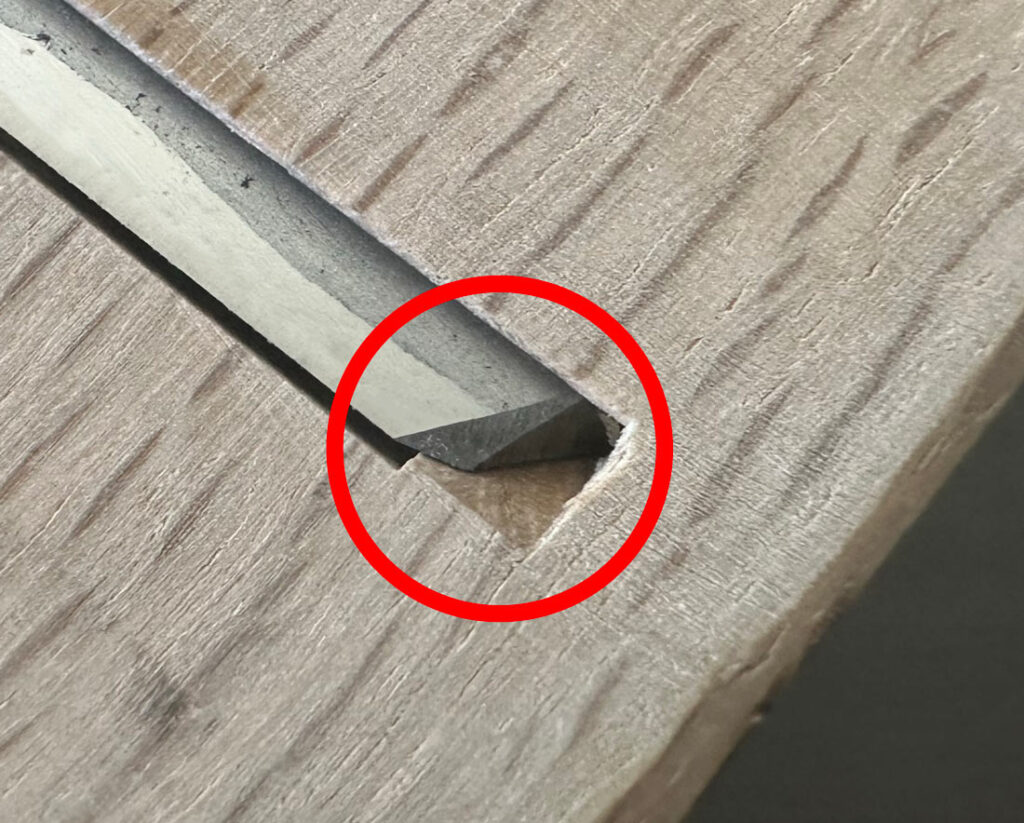
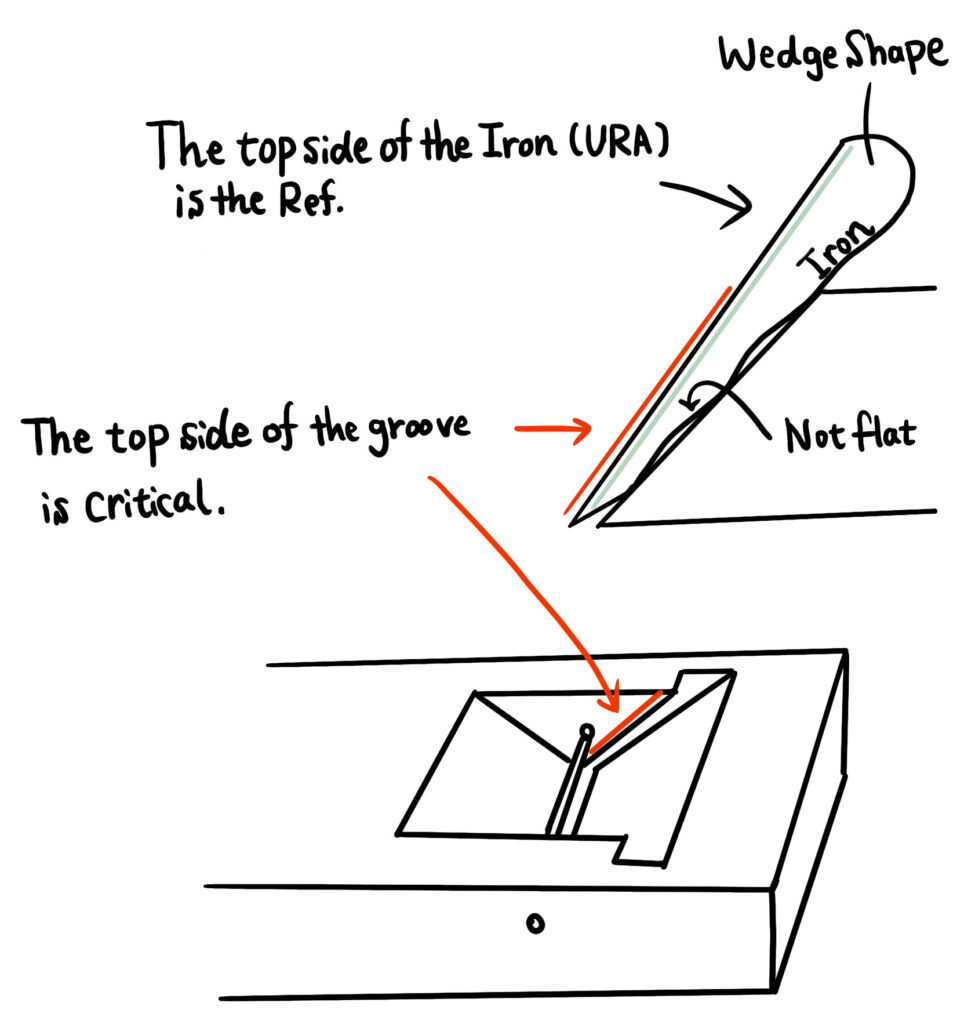
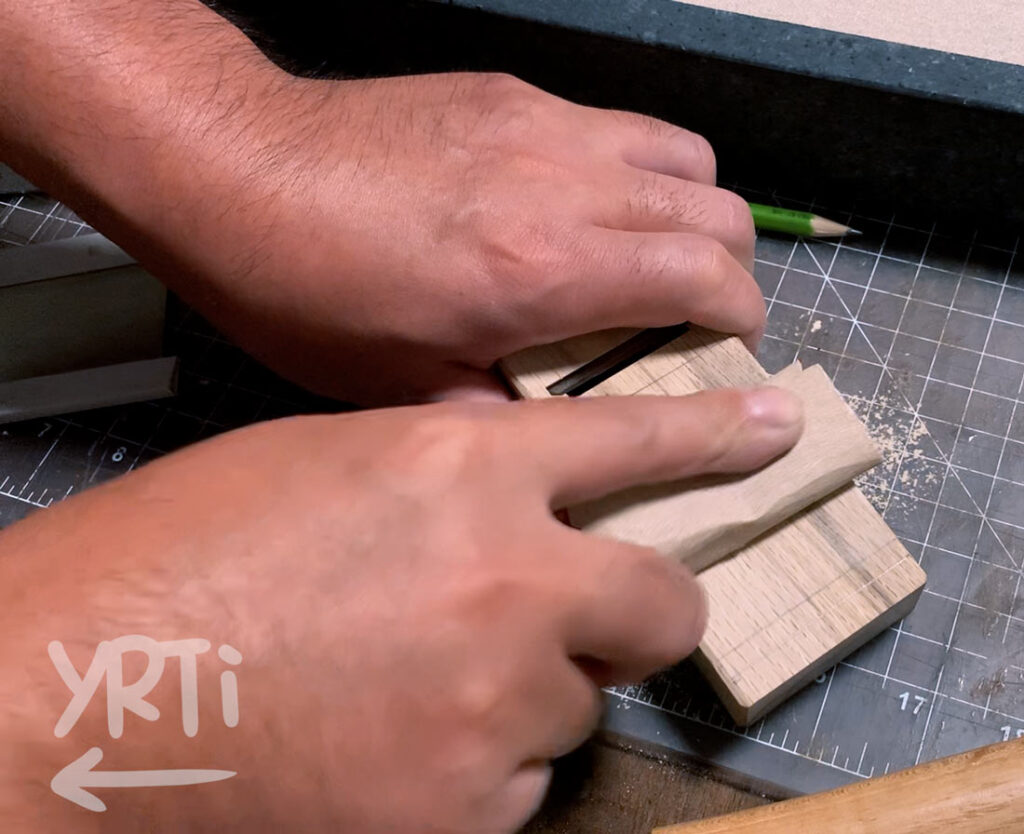
Trim a Mimi of Cutting Iron
I skipped this process in the video since most irons work fine out of the box, but I’ll include it here just in case. This step may also be needed as part of maintenance when sharpening the bevel, because the cutting edge can become slightly wider. Essentially, you need to trim both edges of the cutting iron(called Mimi/ears) so that it is no wider than the mouth opening.
To check if your mimi is correct, place the cutting iron on the sole of the plane and make sure it sits inside the mouth opening, ignoring the side walls of the grooves and focusing only on the actual mouth area, as shown in the picture below.
If the edge sits on the grooves, you need to trim it slightly.
Sharpening the bevel
After flattening, use 1000 and then 4000 grit stones to refine the surface. For this type of plane, finishing at 4000 grit is sufficient.
If the bevel angle is off, correct it using the diamond plate before refining on stones. When sharpening, short strokes feel more stable than long strokes, especially with small irons.
For the chip breaker, a few strokes at a high angle, around 50 degrees, are enough. It does not need extreme precision.
Adjusting the Blade Fitment to the Dai
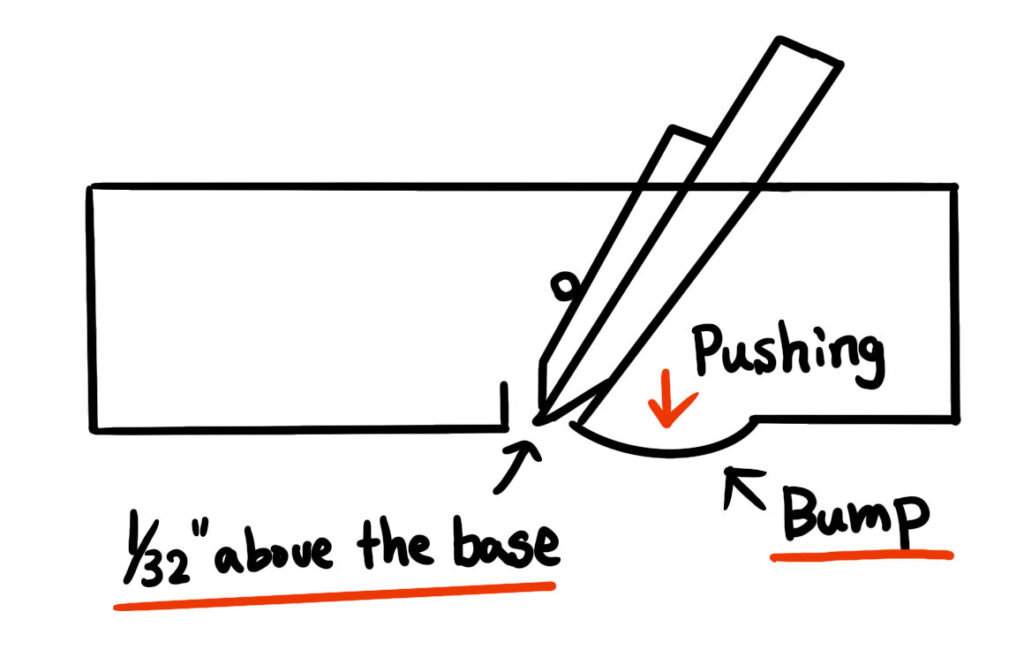
To fit the iron, shave and adjust the plane bed where the blade sits. Do not shave the top of the grooves. Those surfaces define the blade angle of the plane. Removing material there will effectively change the cutting angle.
Mark the cutting iron with pencil graphite, insert it into the dai, then remove it. Wherever graphite transfers to the base is where material should be shaved. Repeat this process until the cutting edge reaches about 1/32 inch from the mouth.
Usually, after this process, you need to adjust the side walls of where the chip breaker sits to make it fit properly. However, the Kakuri 42mm plane always comes with a good fit, so you can skip this step unless the chip breaker is too tight to fit.
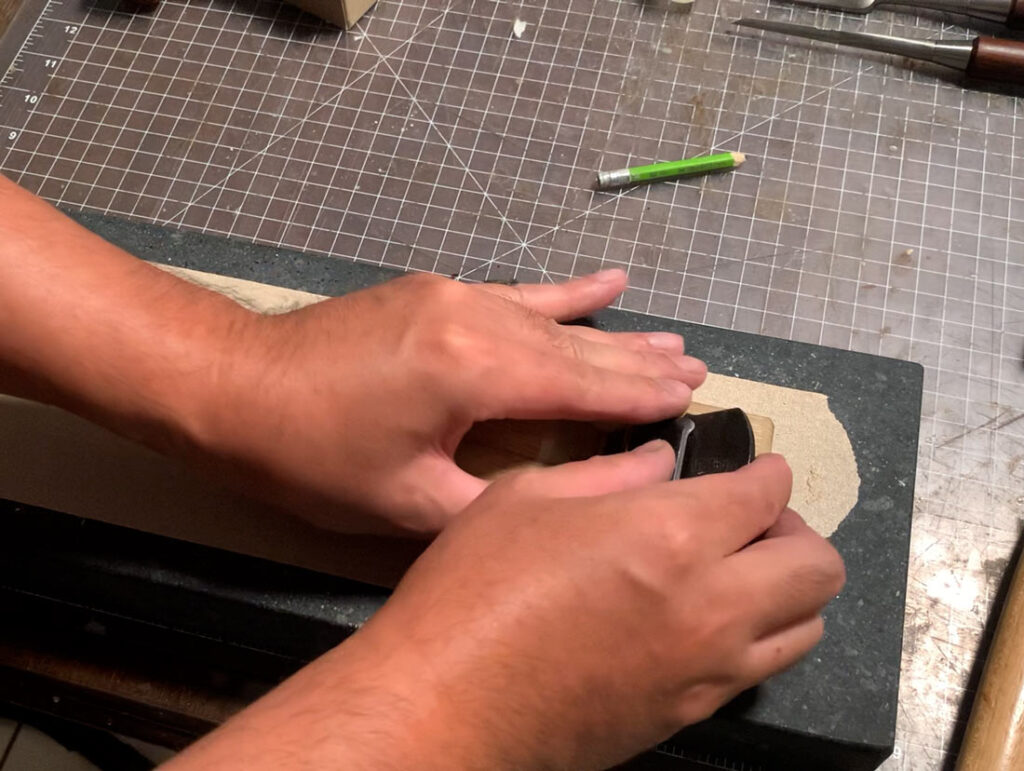
Flattening the sole
Flatten the sole using sandpaper on a granite surface plate or glass. Use around 120 to 180 grit if the base is significantly out of flat.
For final flattening, insert the irons into the plane because they create pressure that slightly distorts the sole. Leave the iron slightly above the sole so the sandpaper does not damage the edge.
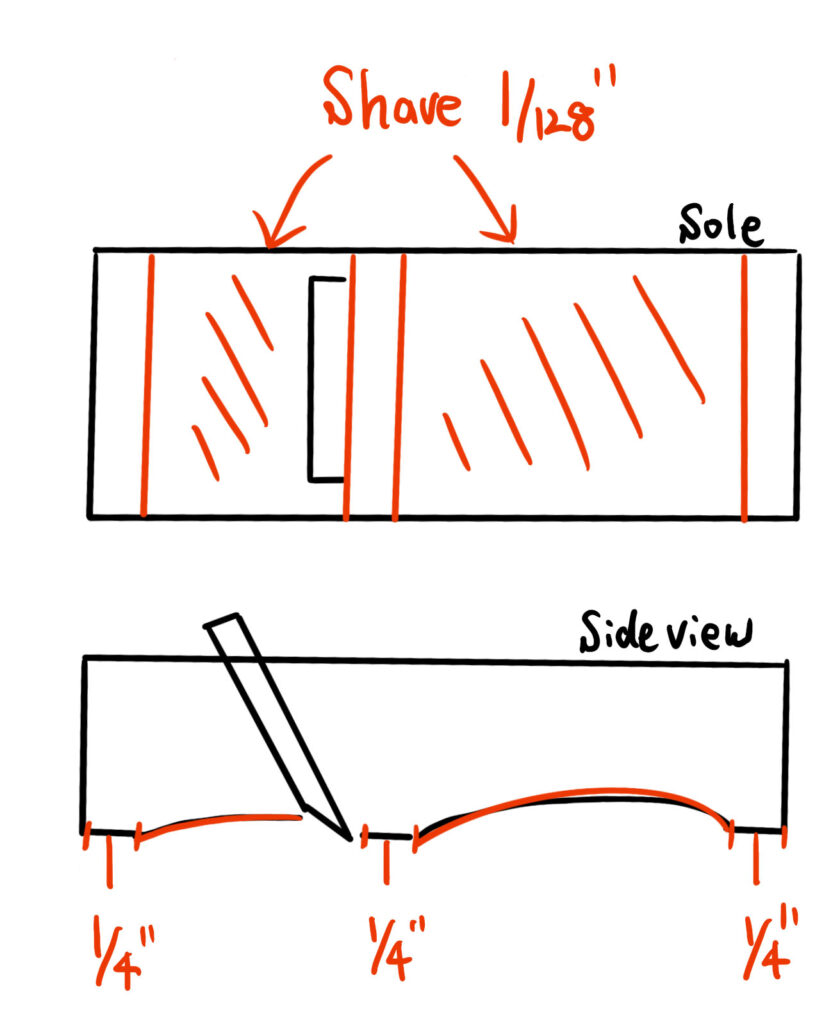
Shaping the sole
Once flat, shape the sole by leaving flat areas at three points: the heel, the toe, and just below the mouth. Leave about 1/4 to 1/2 inch flat at those locations. Sand the rest slightly lower, about the thickness of a postcard. You should be able to see light passing through the relieved areas while the three contact points remain solid.
That is it! Now you can use the hand plane! If you know better ways to set it up, please share it for other people:)