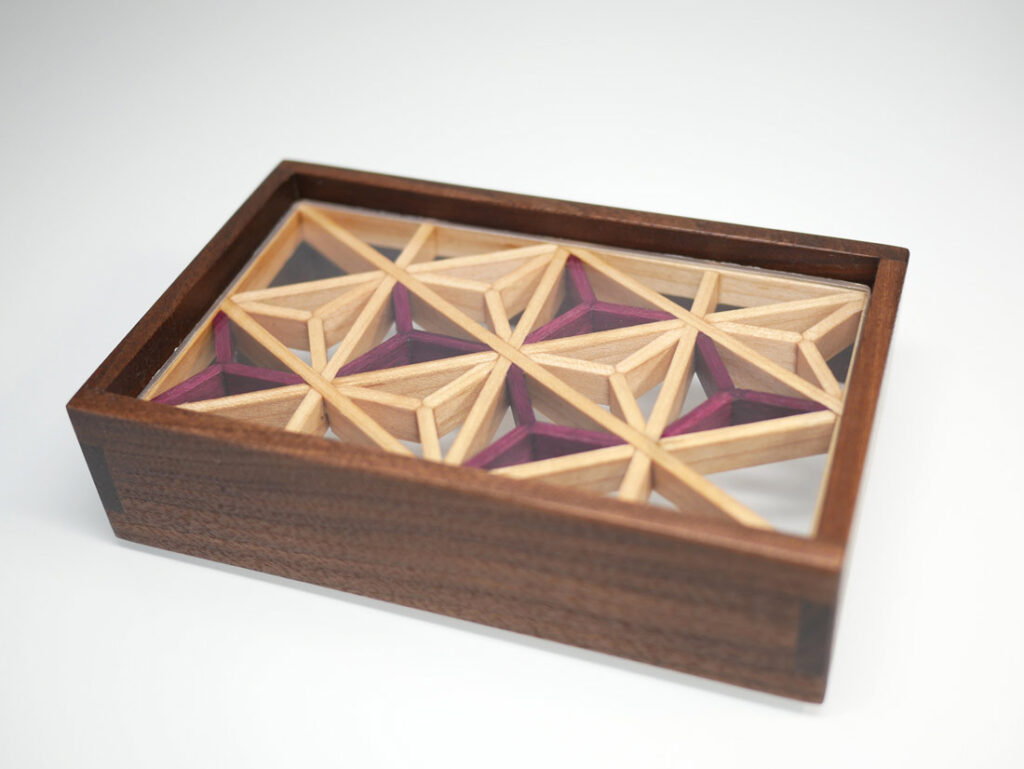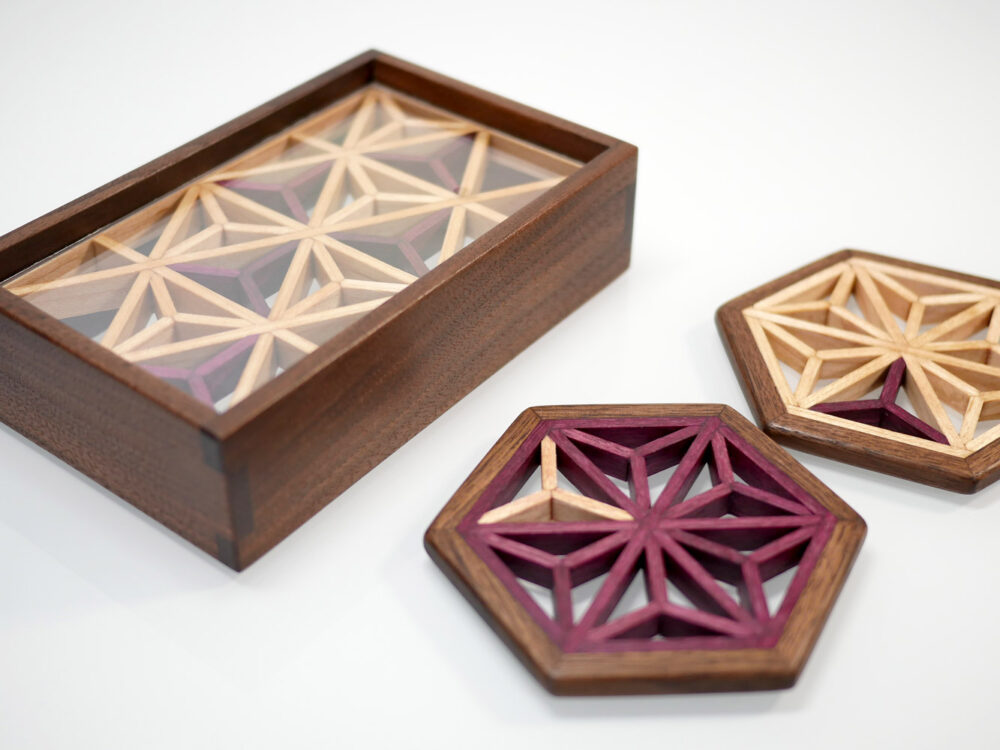
As I get familiar to making Kumiko, I tried using hardwood for Kumiko to make things I want to use, which were coasters and a serving tray for my favorite snickers.
Project Summary
I made coasters and a serving tray in Kumiko style. This is also my first project to use good looking hardwood as the main material. Additionally, I tried a dovetail joint (I thought it was a dovetail joint but it’s just a finger joint. I was that much beginner level).
- Tools I used
- Pull Hobby Saw
- Japanese Pull Saw
- Marking Gauge
- Xacto Knife
- Planer
- Chisels
On this page, I will share the tips I found during the project. For the steps of how I made it, please watch the video.
My Findings
Choose the Right Tools and Materials
Rip Cut Saw Choice
I bought a small Japanese pull saw to do a rip cut of 1/4″ walnut for Kumiko coaster frames and outside of the tray. If it were 1/8″ I could just cut out the strip by a marking gauge but 1/4″ was too thick for it. This was pretty much my first time cutting things with a handsaw for in a longtime and it cuts wood very quickly. However, the saw is for rough cuts and its kerf was almost like 1/16″. That means if I do 6 cuts, I’m wasting almost like 3/8″, the same width as my Kumiko strips. I later decided to buy a finer saw but at this time I didn’t have it. For people who aren’t doing a large project, the saw kerf width is something you should consider.

Hand Plane was Great
I underestimated why a plane is important to a project. I used it a little bit in the last project but I didn’t know much about the plane and I thought it’s just like a sander to even out the surface of wood. After, I read some of how to use plane guides and adjusted the plane, it’s totally different from a sander and nothing but a miracle tool. I mean, you can make a real flat surface easily with a plane. It was only $20 so I strongly recommend you to buy one and learn how to use if you are a beginner like me. It makes a huge difference on the finish.
Hardwood Kumiko Easily Breaks
I tried making Kumiko by hardwood. As I use 1/8″ thin strips, I cut out the joint slots almost the same size as the strip width or a little bigger. If it were basswood, even when the slots run a little on the narrower side, basswood can be compressed to make the snug fit but that’s not the case for hardwood. I actually tested different slot width out side of the video and broke several of them. If you make Kumiko with hardwood, please be sure to test it.

Building Tips
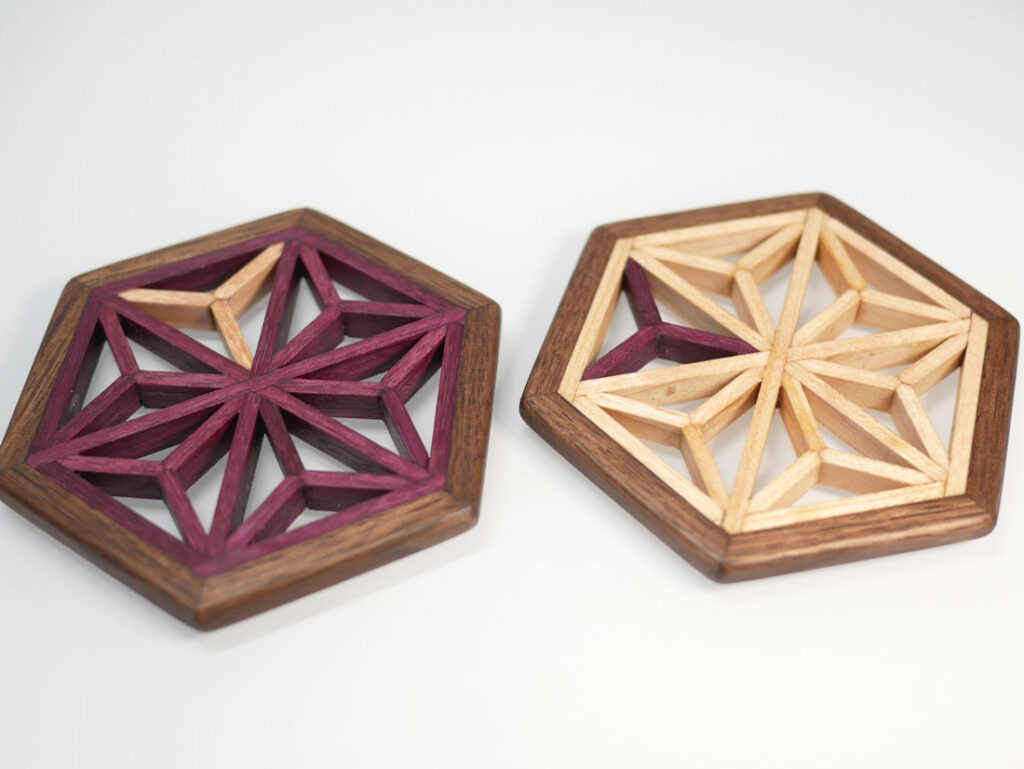
Kumiko Filling
I wanted to make Goma Gara pattern Kumiko but it was extremely difficult to cut out slots on the very edge of 1/8″ small pieces. It breaks easily while cutting out the slots. I wasn’t sure how many of the pieces I can make successfully out of the wood I had so I ended up using Asa no ha instead of Goma Gara. It was much easier. If you want to make Goma Gara, please test if you can do it with couple of sample pieces to be sure you can do it.

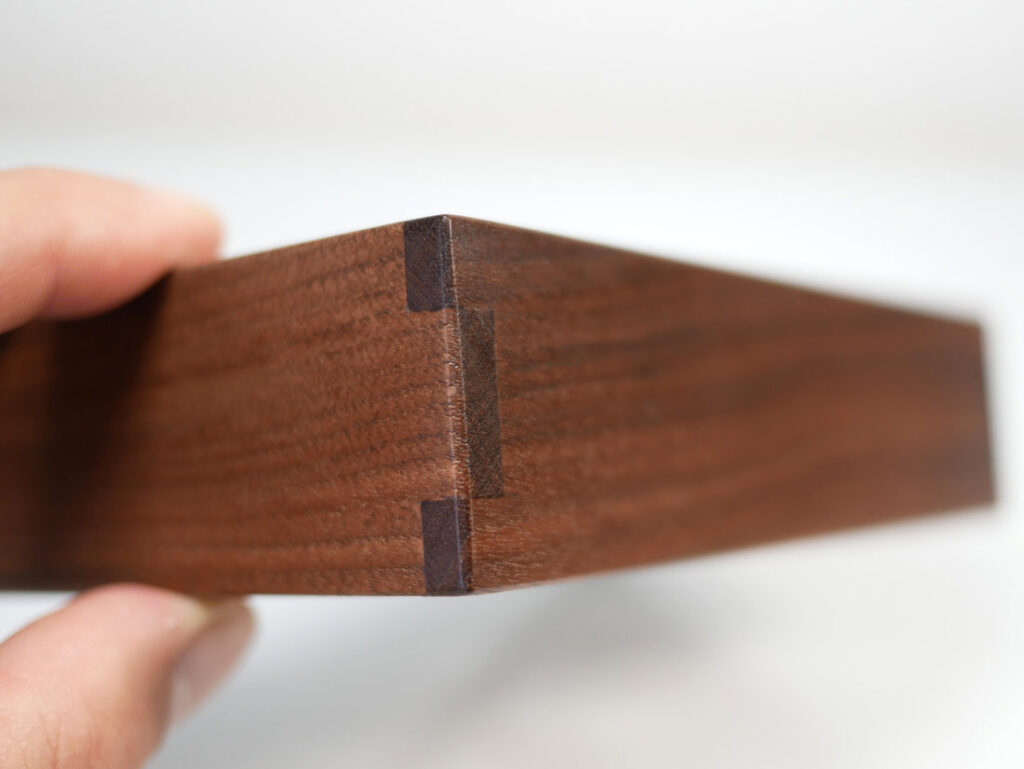
Dovetail Joint
This wasn’t actually a dovetail but it’s my first time making something similar to dovetail. First of all, do not measure and mark the size by using a ruler! depending on your pen sharpness, your marking lines can get slightly different width or length on each piece. It’s very important to have a real snug fit dovetail.
For this matter, using a marking gauge to draw a line will help you so much. You set width on a marking gauge and copy the width to all other pieces then set another width and copy the width to all others.
The next thing is chiseling. Be sure to cut in the marked line about 1/16″ deep with a chisel or a knife first that protects the edge from being chipped. Then use a piece of wood as a reference of the chisel to cut straight.

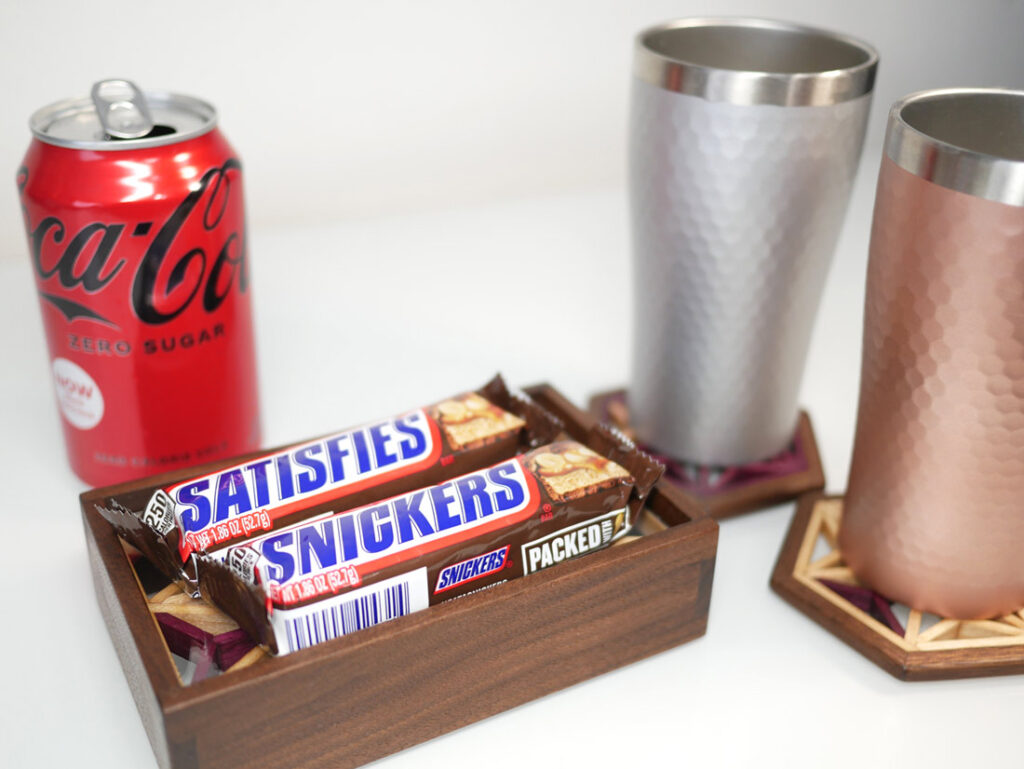
The Coaster Thing
Size of Coaster
The standard size of the coaster is 3.5 – 4 inches in the U.S. but I think 4 inches is too big unless you have a giant mug cup but that’s a personal preference. Well, the coaster standard size where I’m from is 90mm(3.5inches) so I went with it.
Just Try
Thant’s it!
Product Gallery