As I see many people on YouTube introduce a box making as a simple beginner project, I tried it with hand tools!
Let me tell you straight to the point before anything else, it’s a good learning project but at the same time, it wasn’t that easy because there is not much room to hide mistakes!
Project Summary
By utilizing the tools I made, I want to make a super simple box with a 4 hour time limit.
- Tools I used
- Hand Saws
- Chisels
- Hand Planes
- Cutting Gauge (Self made)
- Router Plane (Self made)
- Miter Shooting Board (Self made)
On this page, I will share the tips I found during the project. For the steps of how I made it, please watch the video.
My Findings
Board Preparation
Planning is Important
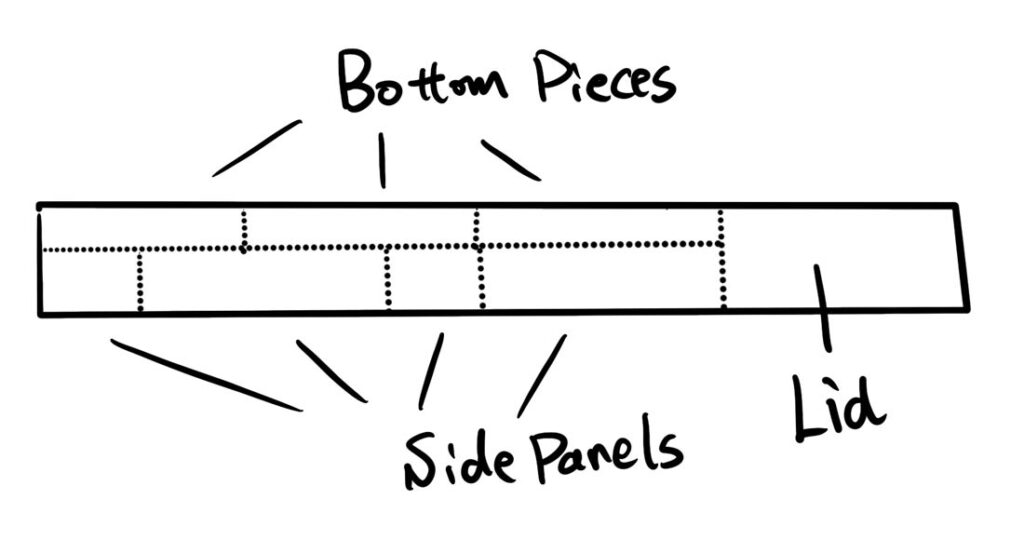
I wanted to make a small box by using materials efficiently so I planned to make this box from one 3ft 1/4″ x 3-1/2″ board. Planning a project is always like solving a math problem to me but I enjoy this process.
Warikebiki
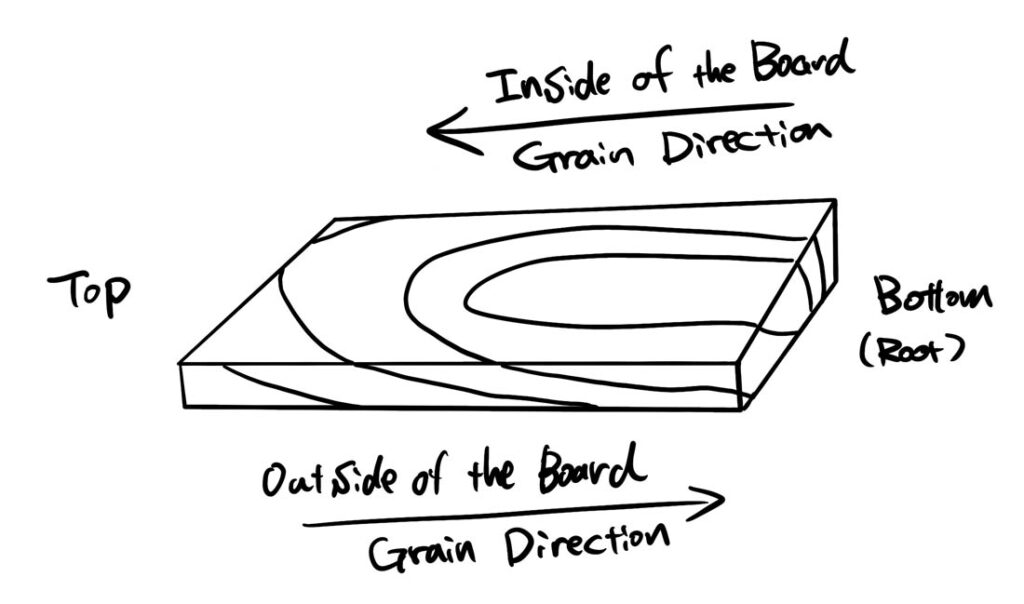
When you split a board by Warikebiki, it’s good to score a board with a grain just like when you do a hand plane. This is the same logic as when you do a rip cut with a hand saw. If you go against the grain, there will be tear out.
When it’s almost done cutting a board from both sides, you can tap it with a mallet and snap it.

Hand Plane
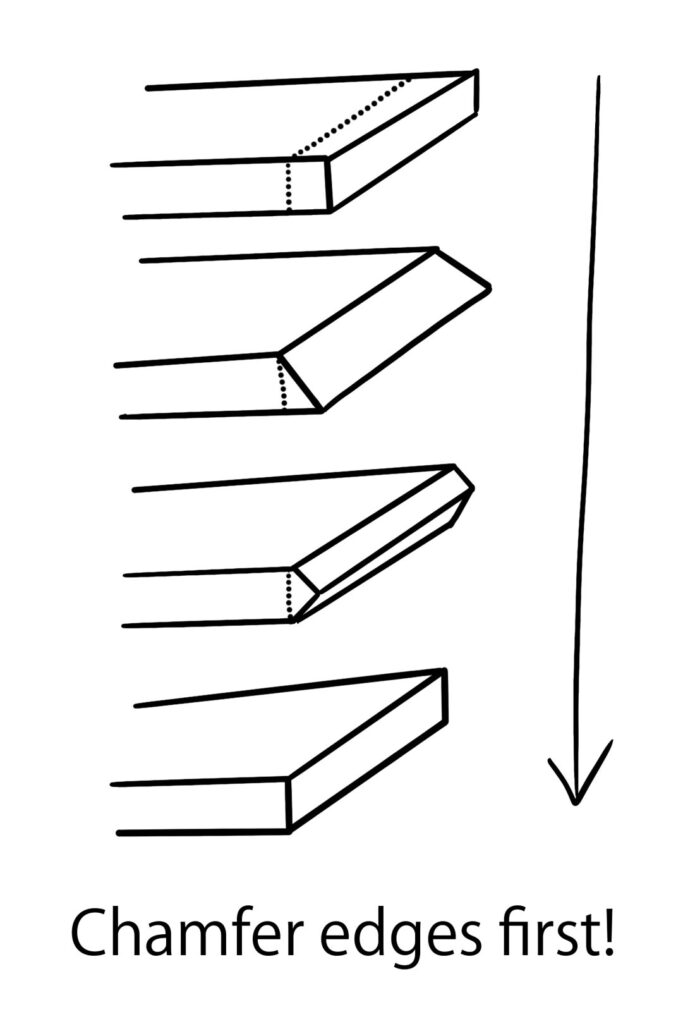
When you refine the board length(end grain) by a hand plane, you can first shave the end grain until a target line just like when you do chamfering the edge from both sides. Then, remove the middle part. This reduces the resistance.
Additionally when doing a hand plane on the end grain, putting a little bit of water on it softens the wood and it’s easier to shave.
Board Fabrication
Making a Groove
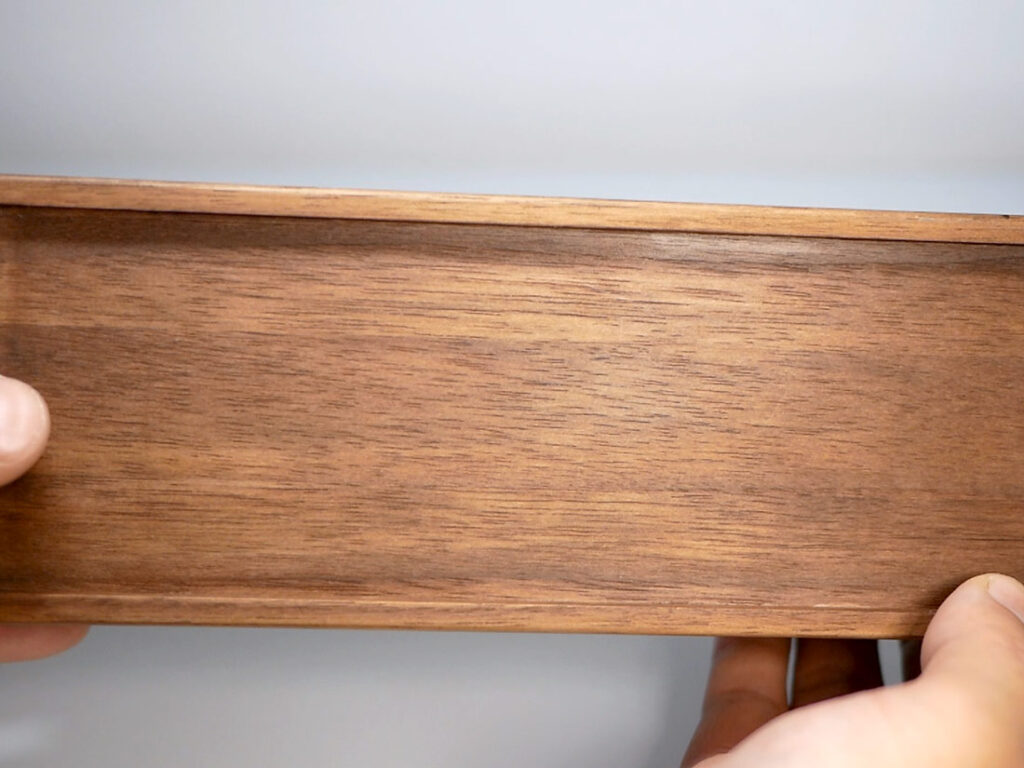
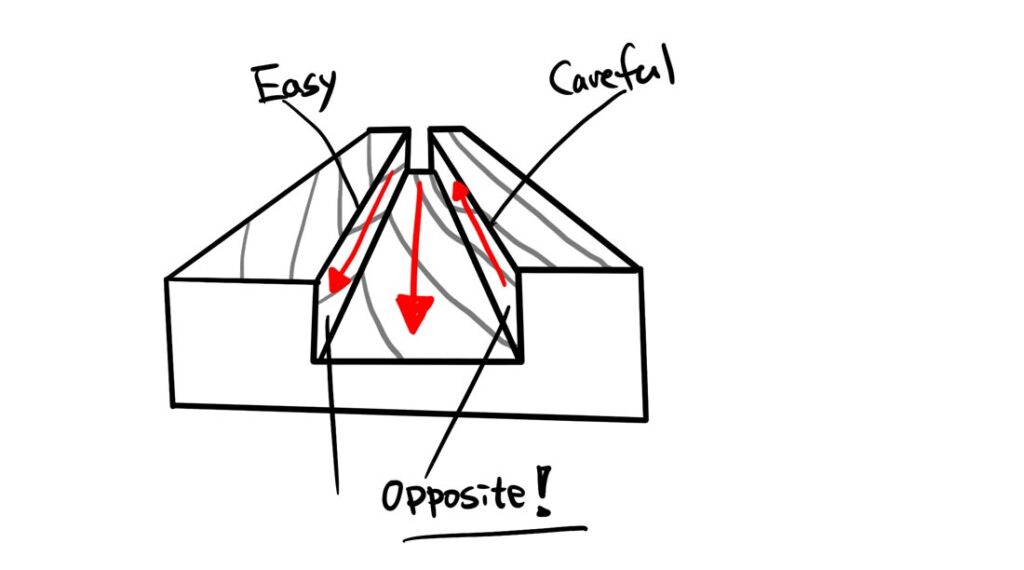
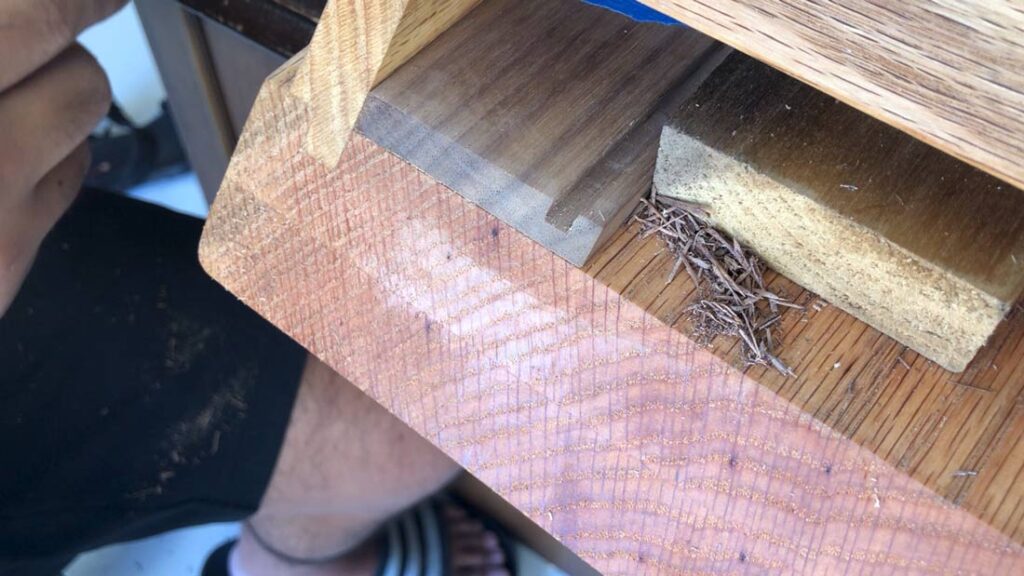
When you make a groove with a grain, please note you need to be sure the both ends of the groove is cut by a knife well before doing a router plane. Even if you do so, grain directions of the groove will look like the following picture so you should be careful with removing the waste near the edge where grains run opposite directions especially around the surface. If your blade accidentally hit the edge, it may catch the grain of the wall and cause the side wall to tear out. When I sensed it, I left it and used a chisel later to clean it.
Miter Cut
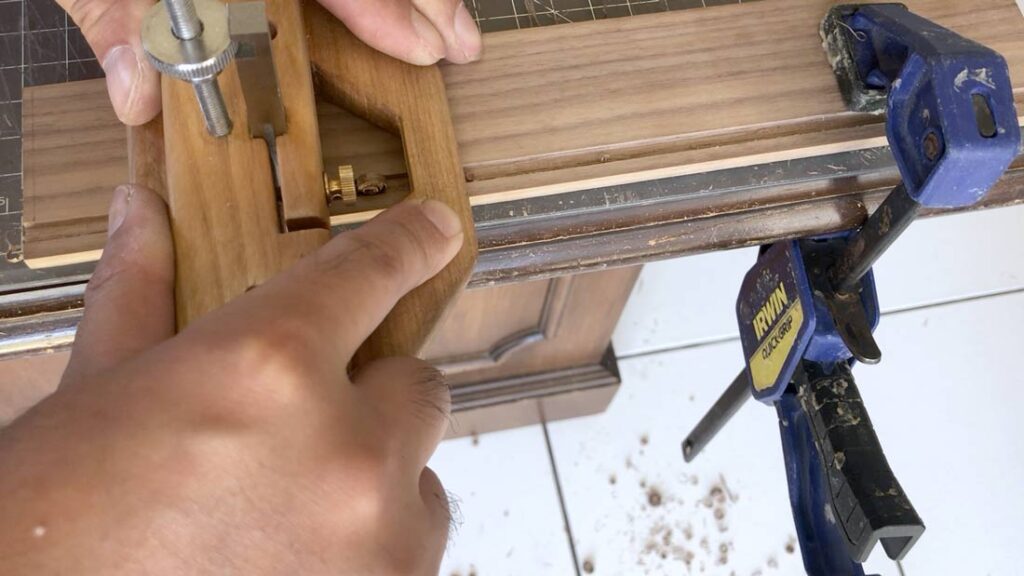
I used a miter shooting board that I made so it wasn’t difficult to fabricate. It’s one of the quickest joint to make so I recommend making a jig like this if you plan to do a lot of box projects.
Jointing Boards
When jointing boards, you should make all surface grains in the same direction so you can plane the surface after jointing the boards.
Assemble
Glue Time on Miter Joints
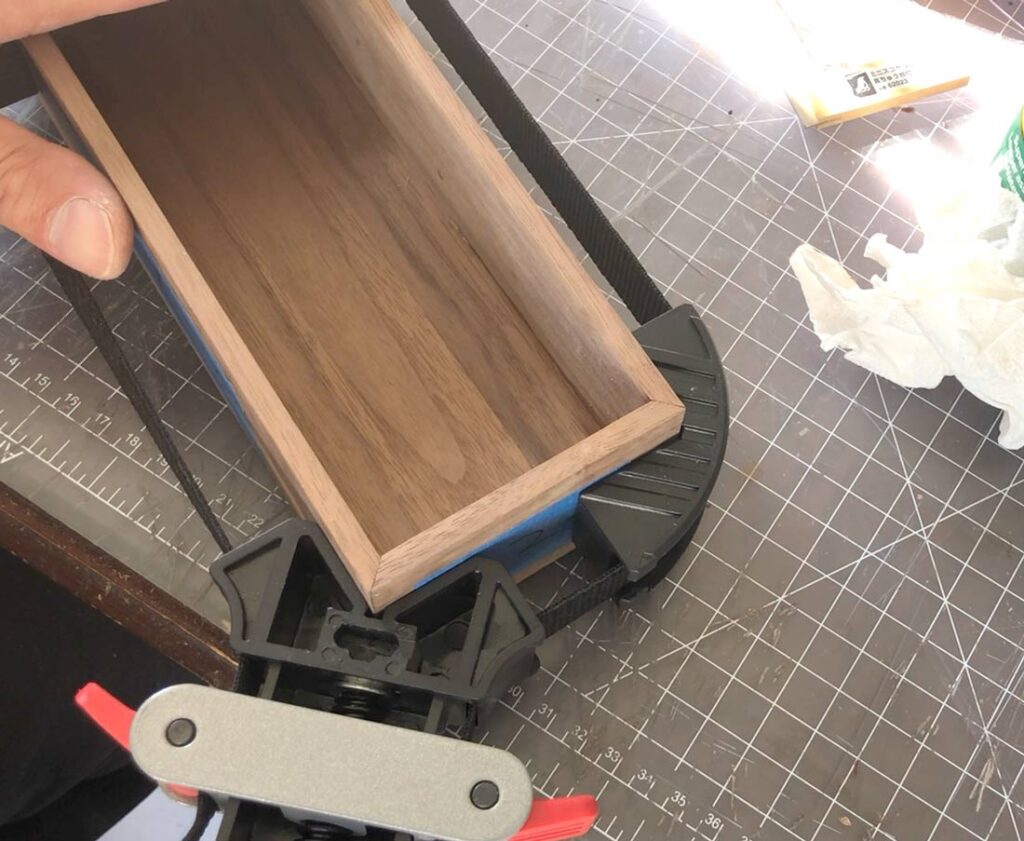
The pieces were assembled well when dry fitting but gluing time is critical. I was too slow and put too much glue. Then, the glue hardened to make a little build up that generated a gap on other miter corners. The amount of glue to use and quick gluing time are the things to be considered especially when using a thin board like 1/4″.
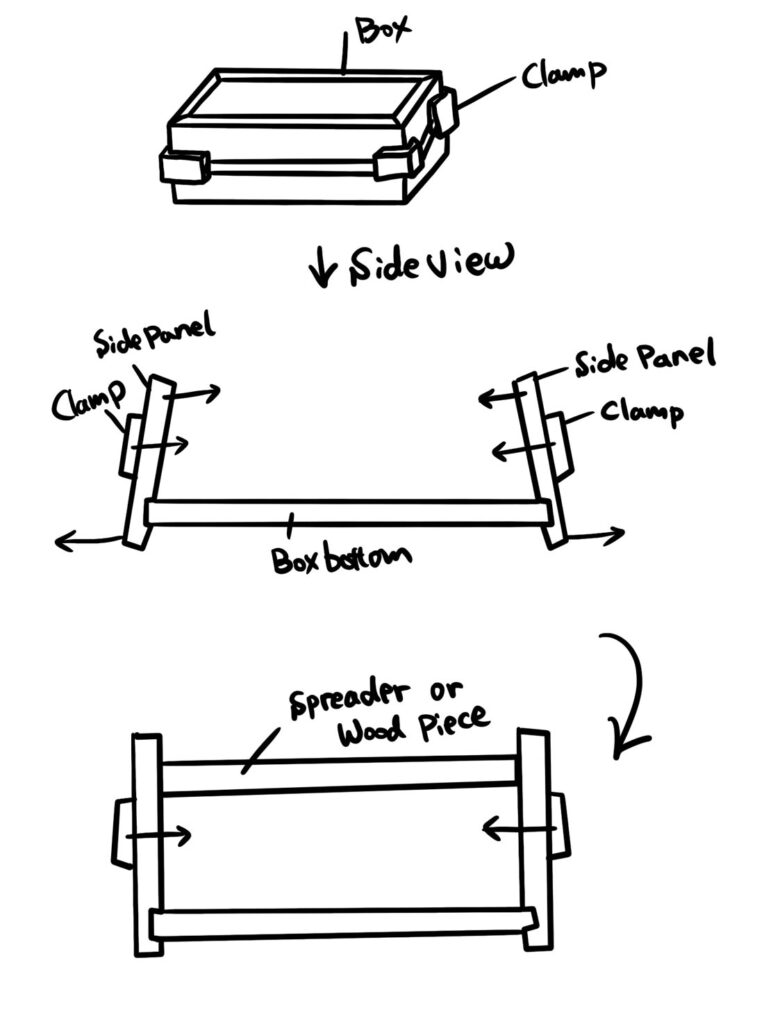
Additionally, to squeeze out the excess amount of glue, it’s good to use a clamp. However, the clamping position is also critical. The little gap generated by the glue may cause the box to be slightly out of the shape when clamping like the picture. It’s safe to use a spreader if you want a real perfect square box.
Just Try!
Honestly, I thought I could finish it within the time limit because I had all tools but I couldn’t! Therefore, I can’t say it was an easy project for beginners but it was a simple project to learn lots of essential skills for woodworking.
Even if you are a power tool guy, it’s still worth trying it by hand tools with the time limit. I’m sure you’ll know more about wood and understand why an edge gets sometimes fuzzy when using a powered router and the end of the board chips.
Additionally, the time limit makes you think how efficiently you can work on a box project that helps you find a better way. I hope you try it, too!
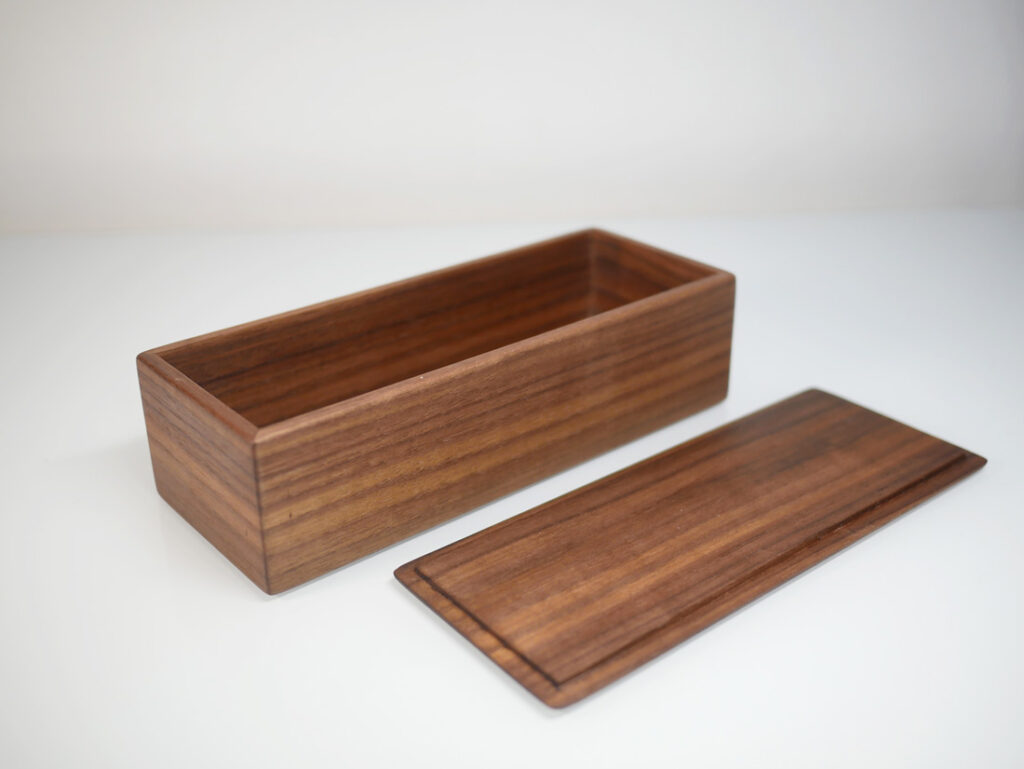
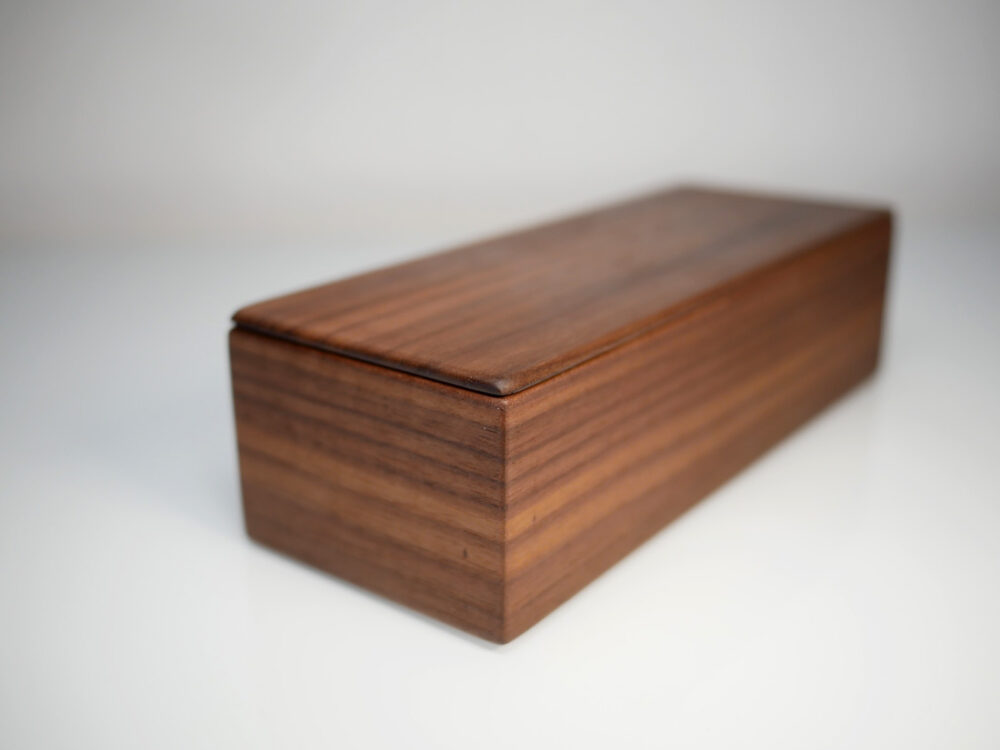
Product Gallery