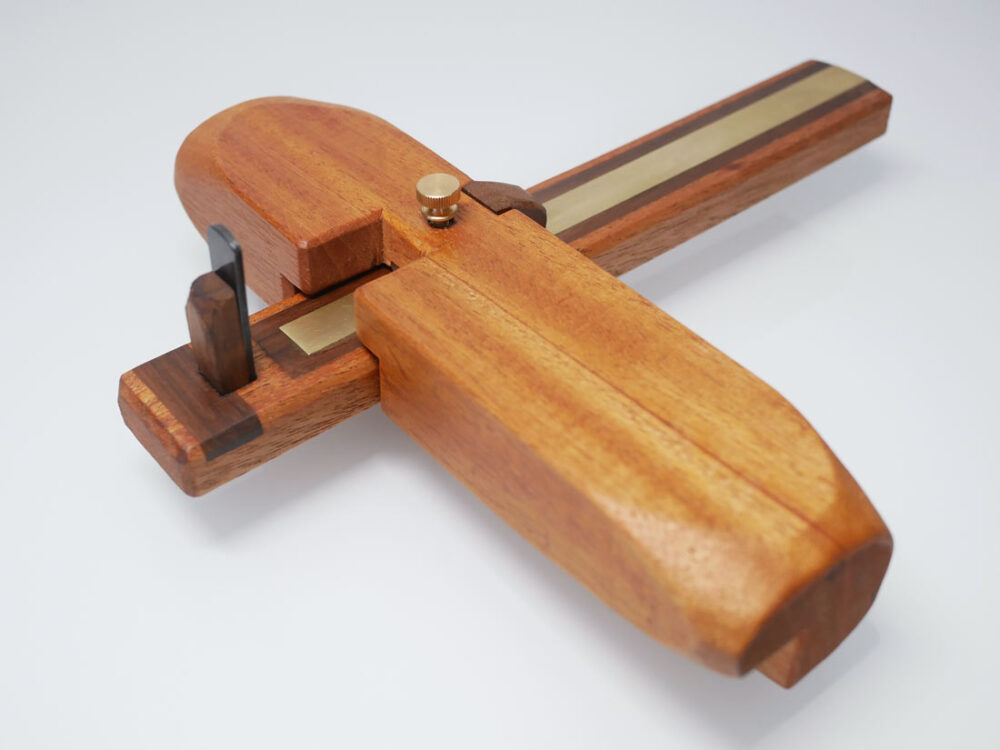
I’ve always wanted to have Wari Kebiki, a Japanese cutting gauge. I used just a regular marking gauge for the same purpose but it can only cut up to 1/8″ so this Wari Kebiki will be a good upgrade for me!
Project Summary
This project is to make a Wari Kebiki that is functional and at least cuts 1/4″ lumber. Additionally, I wanted to source all materials from stores where most people in the US have access to.
- Tools I used
- Hand Saws
- Hand Drill
- Chisels
- Hand Planes
- Marking Gauge
On this page, I will share the tips I found during the project. For the steps of how I made it, please watch the video.
My Findings
Arm
Inlays
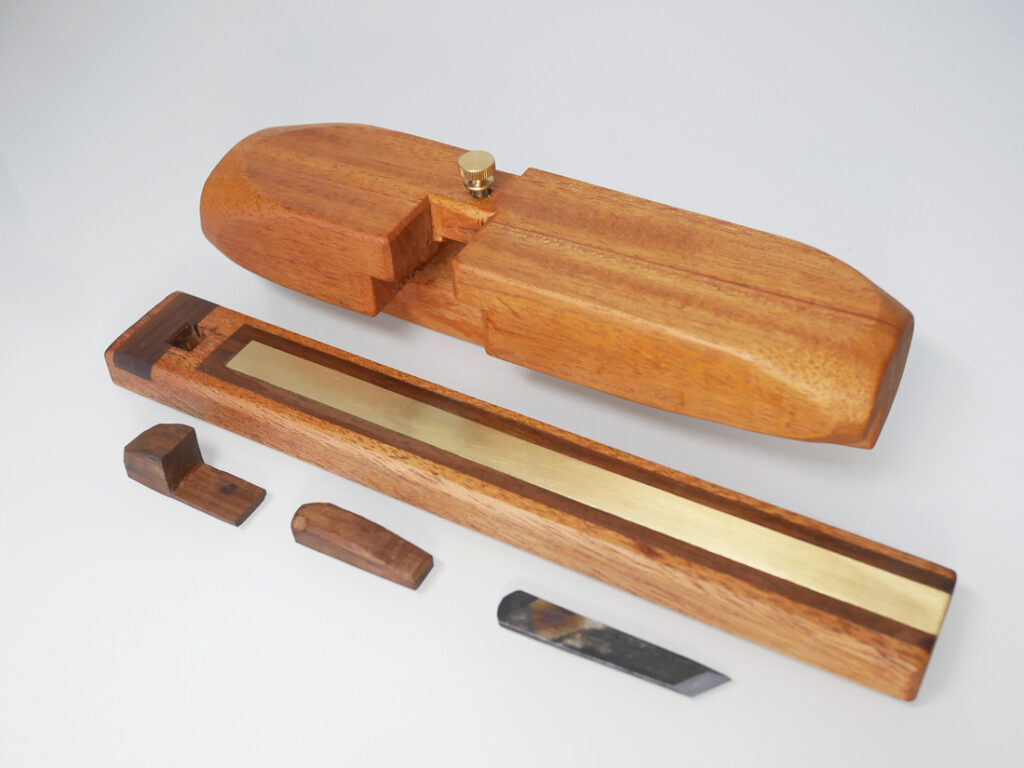
First off, I made an inlay for where I put the blade. As this Wari Kebiki is actually cutting the wood, I really have to tighten the wedge to secure the blade but I was wondering if the edge side of the arm can bare with the stress by the wedge ( the end side of the mortise is about 3/4″ off of the edge so). I think this inlay helps.
Brass Inlay
This was actually for YouTube eye catching reason, I put it but like I mentioned in the video, now I know it’s not that easy to flatten the surface with the brass inlay if the brass is too much proud of the base surface.
I initially used a flat metal surface file to make it flat but it’s difficult to give the file even pressure and when the file slightly tilts, it sands off the edges of the arm and the arm becomes like the mound shape.

Filling the gap
The long side walnut inlay was a little bit messy because mahogany grain is evil and caught my knife blade to a little out side of the inlay line.
I should’ve cut in by the knife little inside of the outline and used a chisel to clean the edges. It could have been much easier and cleaner.
Luckily, I could use a gel type crazy glue to fill it and it’s barely noticeable now.


Size of the Arm
I used 1″x2″ (actual 3/4″ x 1.5″ ) for the arm but I trimmed it to 5/8″ x 1-3/8″. Before making this, I checked how the Japanese real one looks like here and settled in this size. I thought it was too thick but the thickness doesn’t bother me in terms of the style.
Body
Sizing
I used 2″x2″x8″ lumber (the actual size) almost as is (just planed the surface to do minor correction of the squareness). I think for the width, I could have shaved it to 1-3/4″ and for the height, it could have been better if it were 3″. However, the wood was 4 for $12 so I compromised it. If I found 2″x3″ hardwood for the similar price, I would’ve gone with it.
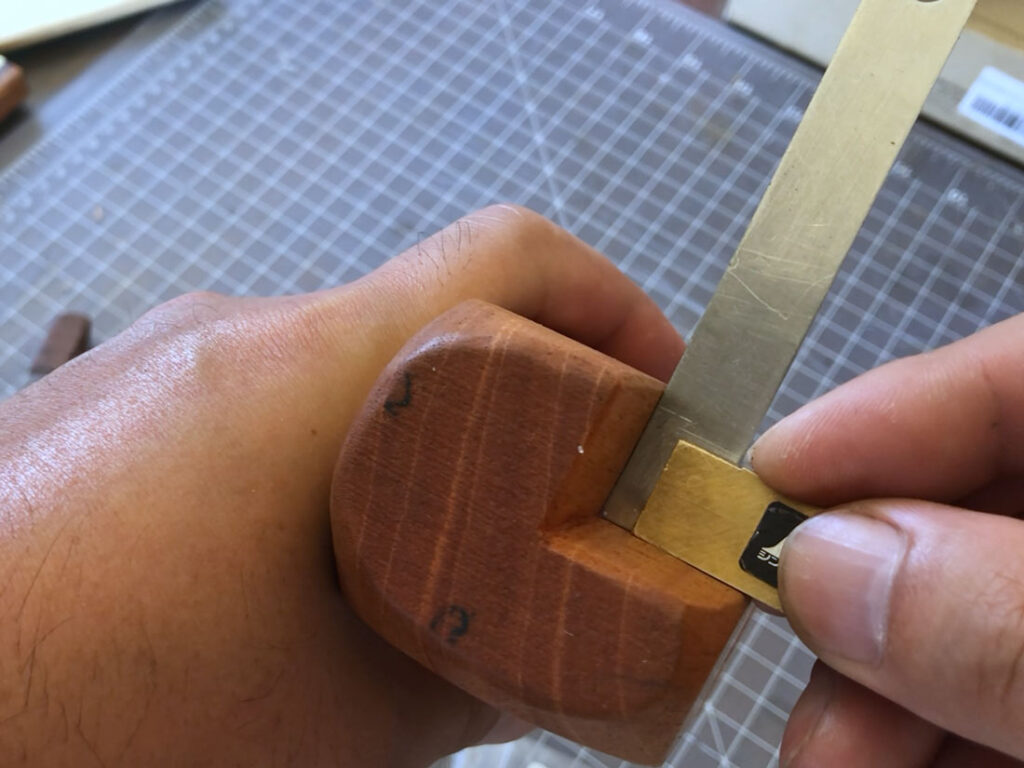
Squareness
The most difficult part of making Wari Kebiki was to make the curved line square to the fence. There is no trick but I simply used a sharp chisel and a small square to check every so often to make it. Please try to read the grain direction first or you may accidentally make a mess of a clean square surface.

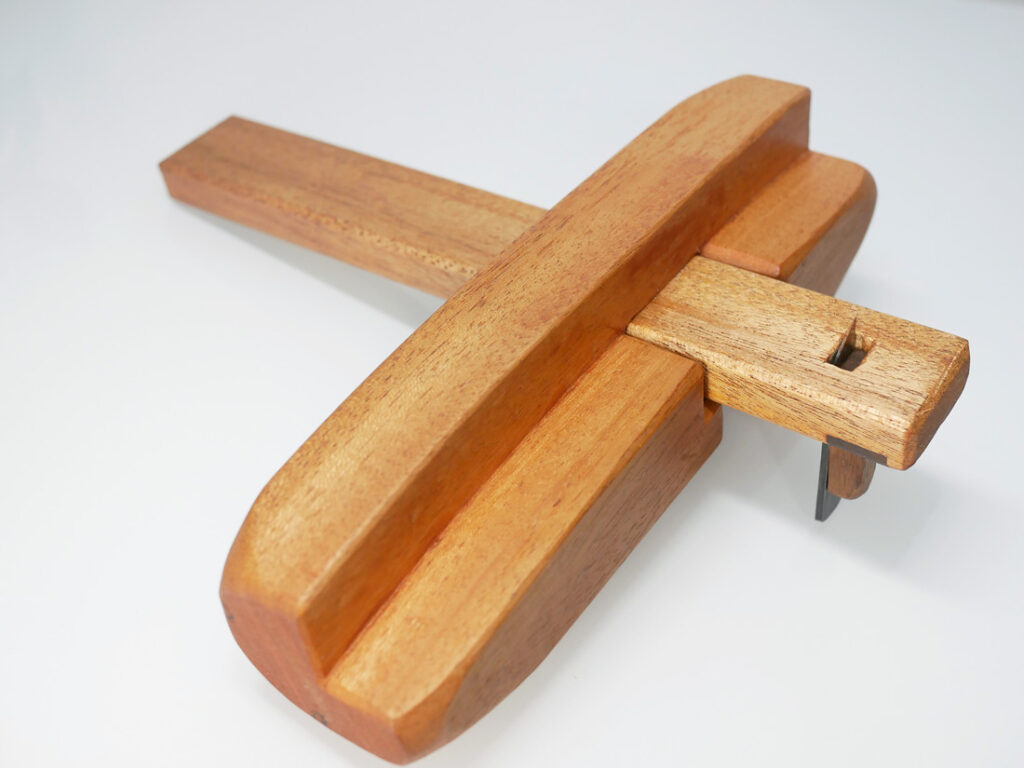
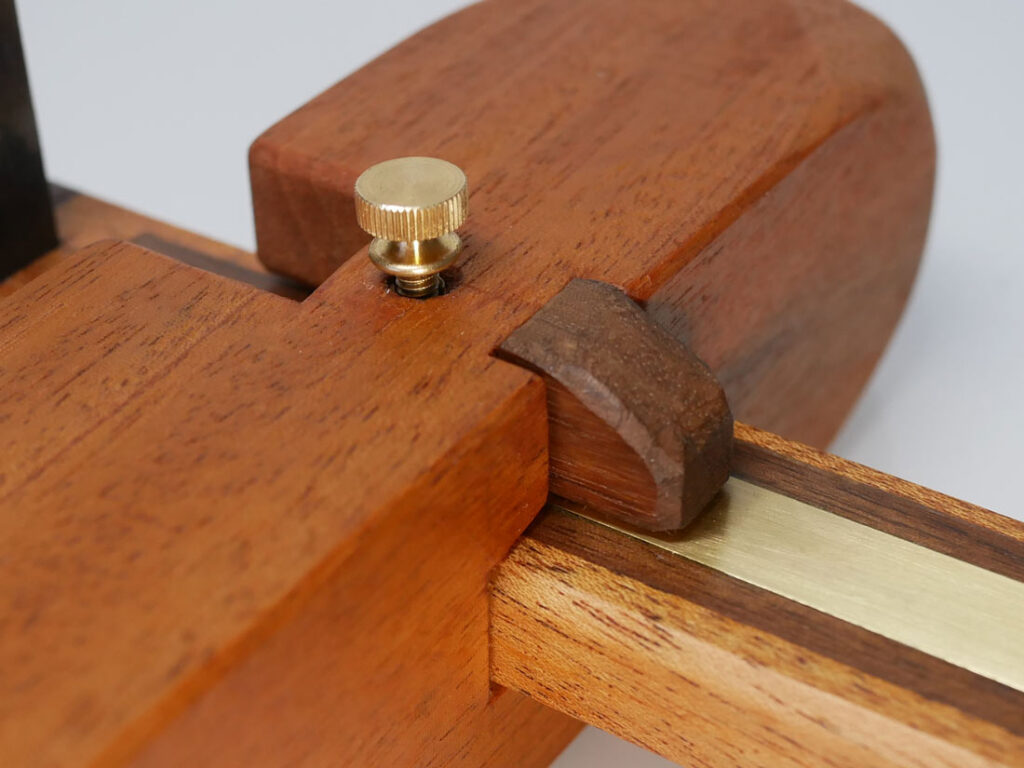
Stopper
I used a brass screw to make a stopper of the arm. It was a #8 screw from the past project so it’s relatively small. The thing was, as I have the brass inlay on the arm and I do not want to scratch it by this brass screw, I made a walnut insert piece to protect the inlay. It also helps the screw to give the even pressure on the arm, too.
Misc
Wood
As it was one of the theme of this project, I tried to source wood from where most of people in the US can access and I found 2″x2″(actual size ) cheaply from Amazon.
I know not many of my level people have a pick up track for lumbers and a table saw to rip them (I don’t! ) so I just wanted to show the way how people like me can still manage a project with thick wood!
Just for a side note, the Homedepot seems like they now have 2″x2″ Walnut/OAK/Hard maple for cheap but they are actually in the nominal size so the actual size is 1.5″ x 1.5″.

Hardware
I used a left over brass screw and insert nut. They were from the Homedepot/Lowe’s.
Blade
I don’t have a metal fabrication tools/skills so I bought one from Amazon Japan. It was about $15 but the shipping cost another $15 to the US. Though, it’s Tsunesaburo blade so it’s a legit end one.
At the time I bought it, there was only 9mm one available and I got it but I think 12mm – 15mm one is better for this use.

Just Try
As I like Kumiko, I really wanted this handy tool but I wasn’t confident enough to make one that’s usable quality. Though, I made it somehow and I think as long as you don’t give up, even if you are a beginner like me, you can make one, too.
Just try!