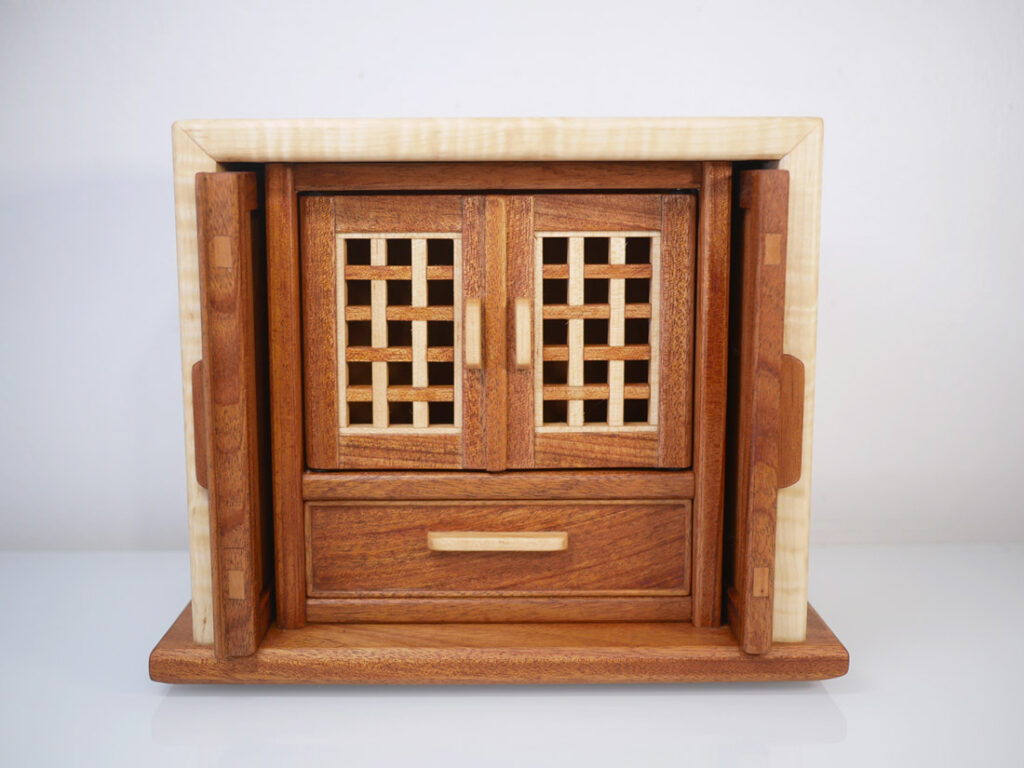
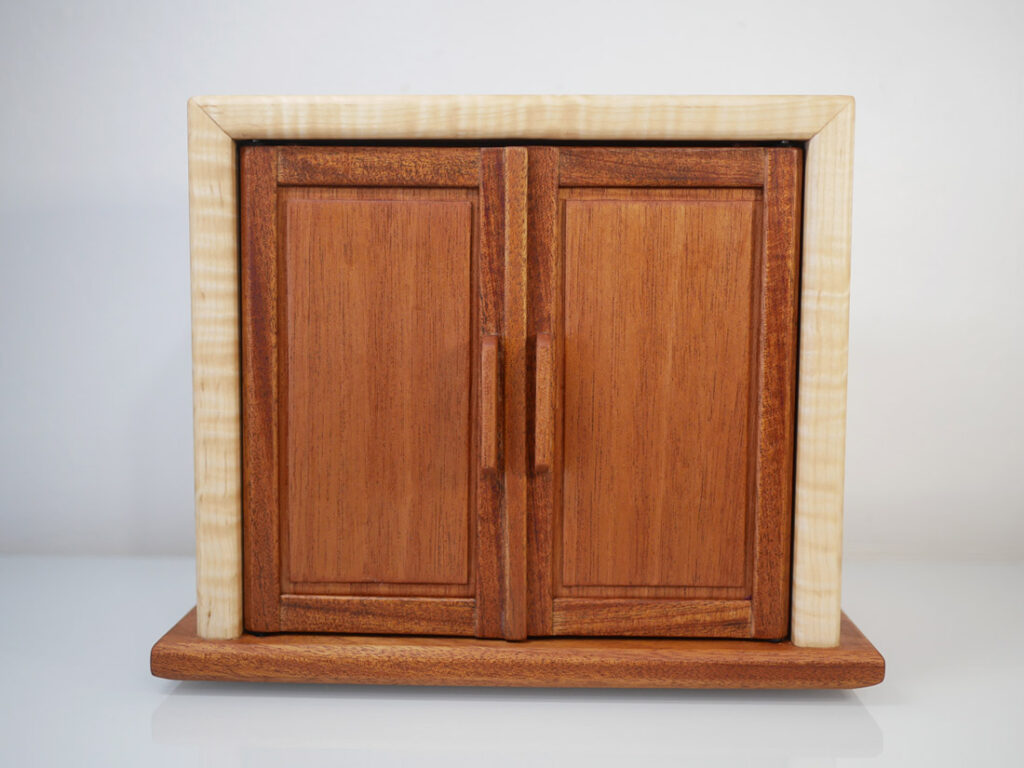
I’ve been enjoying woodworking for the past one year and I wanted to try a mile stone project at this moment so it may encourage my fellow beginners.
Project Summary
I didn’t say much about what I actually wanted to achieve in this project in the video but it’s as follows.
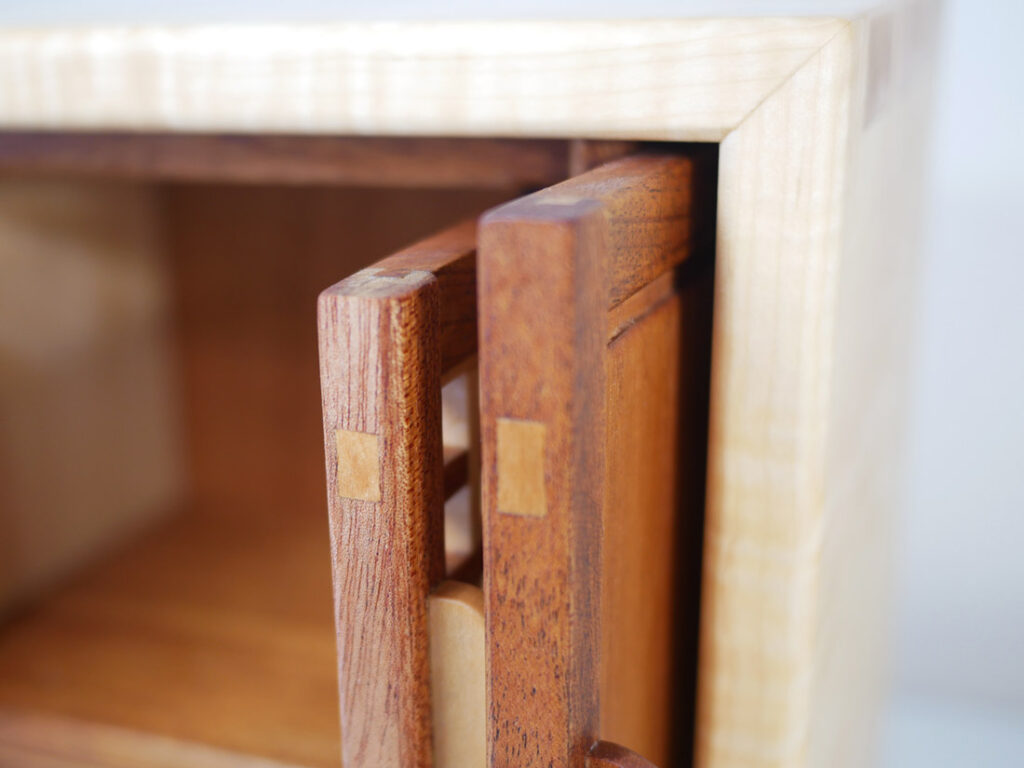
- Something that has a drawer and doors
- Utilizing leftover materials
- Something that is Sashimono inspired
- Use techniques I learned from the past projects
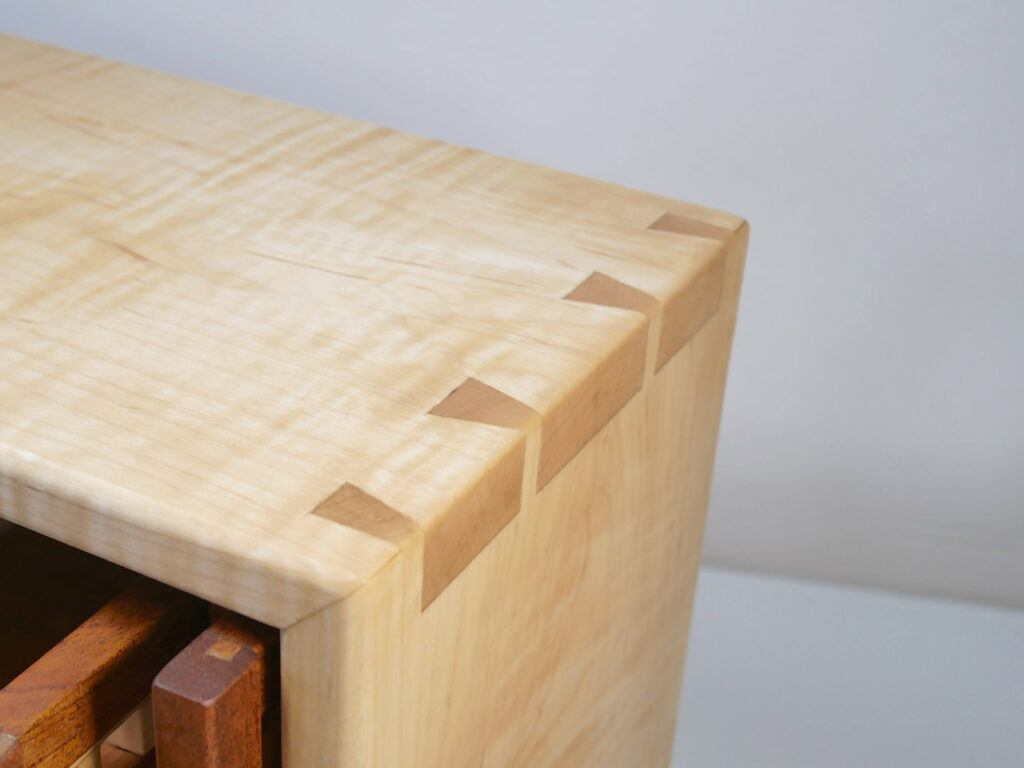
- Try miter dovetail joints
It sounds a lot but I really wanted to make something I can proudly say I made it.
On this page, I will share the tips I found during the project. For the steps of how I made it, please watch the video.
My Findings
Preparation
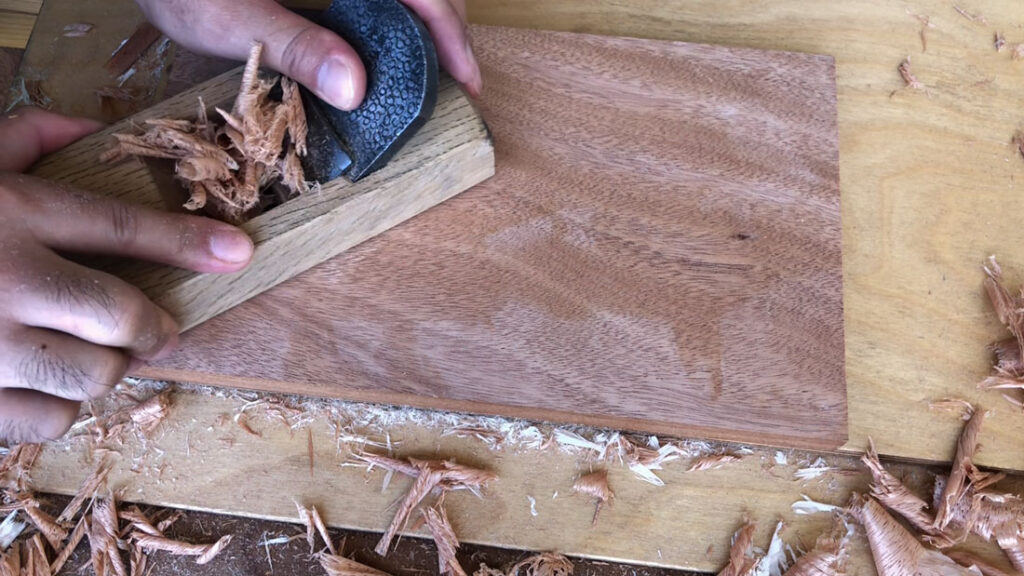
Hand Plane
Japanese hand plane isn’t high angle so when it comes to hard hardwood like maple and it’s curled, it was so difficult to make it flat. For mahogany, it wasn’t easy but if you set the chip breaker right, it does the job.
Plane Jig is a Must Have
I already made a thickness jig for my hand planes and it was so handy when it comes to making small pieces accurately. What I made was kind of a box in a box so making accurate pieces for the inside box was so critical.

Board Plan
To plan which part of a board to use for which part of the box is very important for not only visual reason (grain patterns) but to improve the easiness of the overall fabrication. It’s basically about the grain direction.
I kind of clarify the each step of fabrication and find out which direction the grain should run for easy fabrication.
Fabrication
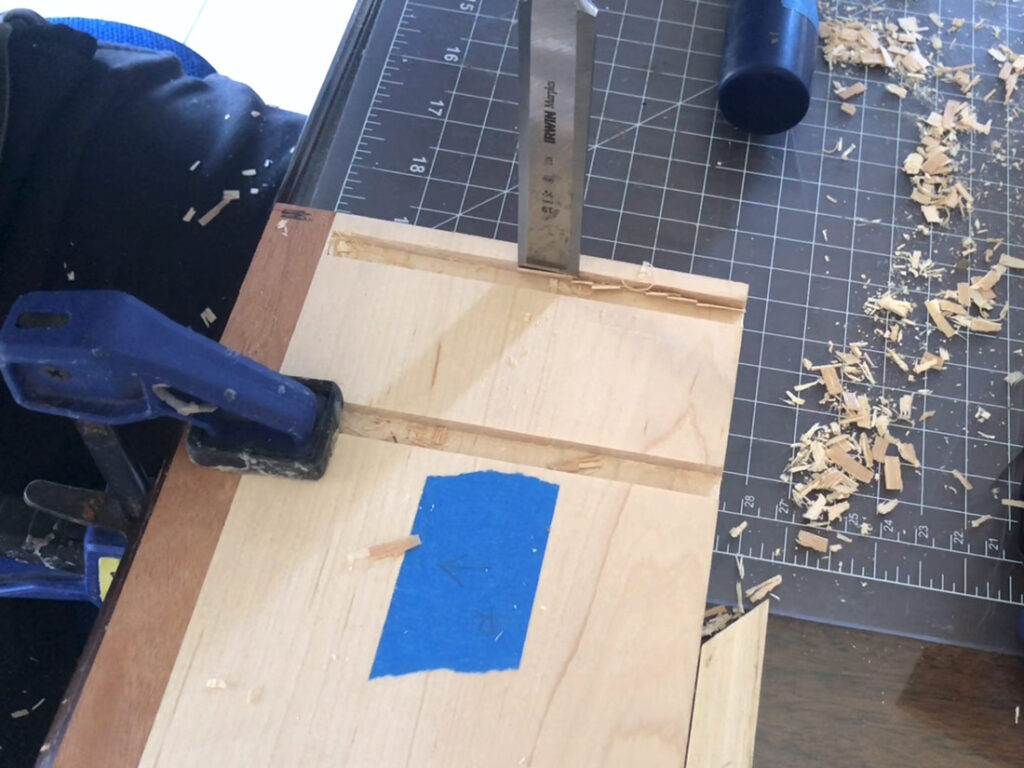
Groove/Dado on the Hardwood
To make a groove/dado on maple was so hard. Since the groove/dado are not running all the way across the boards, I wasn’t able to cut the wood fibers by saw so I used mostly chisels to fabricate them. It was just hard. I should have bought an Azebiki saw prior to this project so I can cut off the fibers first. It would have made things much easier.
It’s always good to use a saw to cut off the fibers whenever you can use a saw and then get rid of the waste part in the middle. It’s way faster.
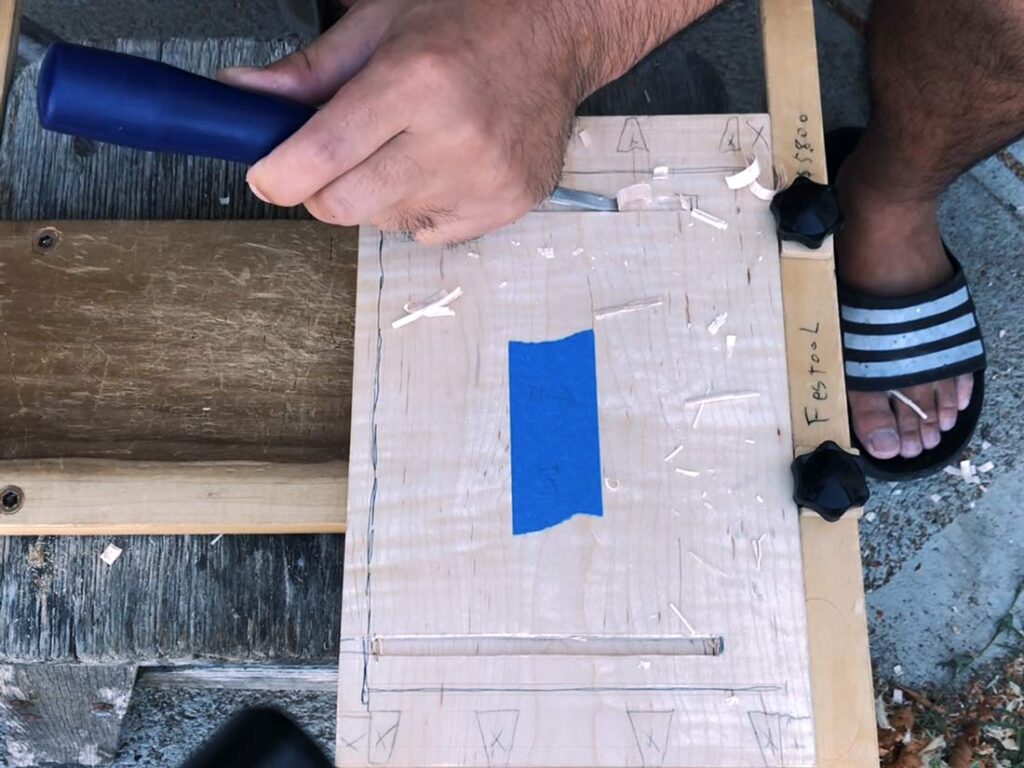
Depth First!
To cut out clean grooves/dados or even a rabbet on an edge/end grain of a board, you should work on the depth first and then work on cleaning the side wall(s) by chisel. Otherwise, you may end up going over the marked lines by accident.
Miter Dovetail
I should write about the dovetail in a separate article so I’ll skip it here. I didn’t do a perfect job but it doesn’t seem like it’s that difficult (It is difficult but not an impossible level joint at all!)
Door Things
Magnets on Doors
I put 2 magnets in each door and put 1/16″ wood to cover the magnets. The magnets are strong enough to hold the doors closed through the 1/16″ wood.
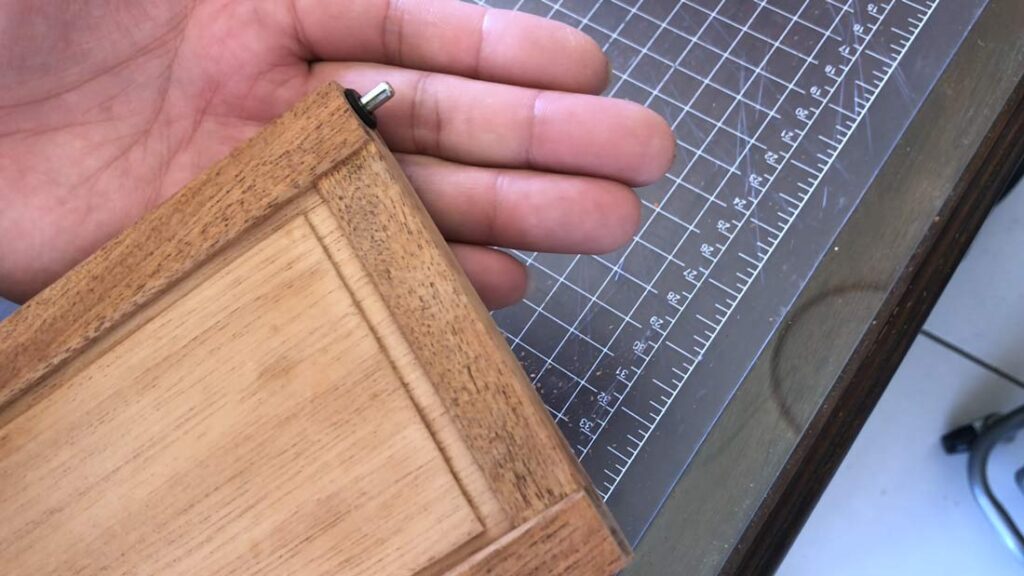
Push Pins
The push pins I used for doors were cheap ones from Amazon and I used hide glue to stabilize the pins to the doors. This is just in case I need to replace the pins if it breaks.
As a door does not have a good amount of a space on top/bottom(both only 1/16″) to retract the door, when I need to replace the pin, I actually have to cut off the pin from the 1/16″ gap to get the door out…
Just Try
It took like 10 days and it was a tough project as I designed it to max out my skill level but I managed to complete it somehow! If you are a beginner, I think it’s good to do a mile stone project like this once in a while by utilizing your max skills to objectively see your current skill level.
This not only gave me a satisfaction that I completed the project but also motivated me to do better.
Product Gallery